You are unsure whether or not disabling Google AMP will result in fewer visitors to your website. This blog post will give you a step-by-step tutorial on how to correctly turn off Google AMP in WordPress without losing visitors. Let’s now examine them.
Describe Google AMP
Accelerated Mobile Pages is a term used by Google AMP. This technology is crucial for facilitating mobile device access quickly. Users who click on any website that supports Google AMP will quickly see the results after doing so. Additionally open-source, AMP was initially promoted by internet giants like Google and Twitter.
Should all WordPress users turn off Google AMP?
In spite of this, Google AMP is a great tool for speeding up your website and enhancing the mobile user experience for your site’s users. However, you must decide whether it is appropriate for you or not.
Your answer will depend on your goal. Use this tool to drive more traffic if mobile users make up the majority of your site’s visits.
On the other hand, if you’ve implemented Google AMP and it’s had a lot of bad effects on your website, like reduced conversion rates. Then turning off Google AMP is a wise move for you.
How to turn off Google AMP in WordPress?
You may put the following into practice to turn off Google AMP in WordPress:
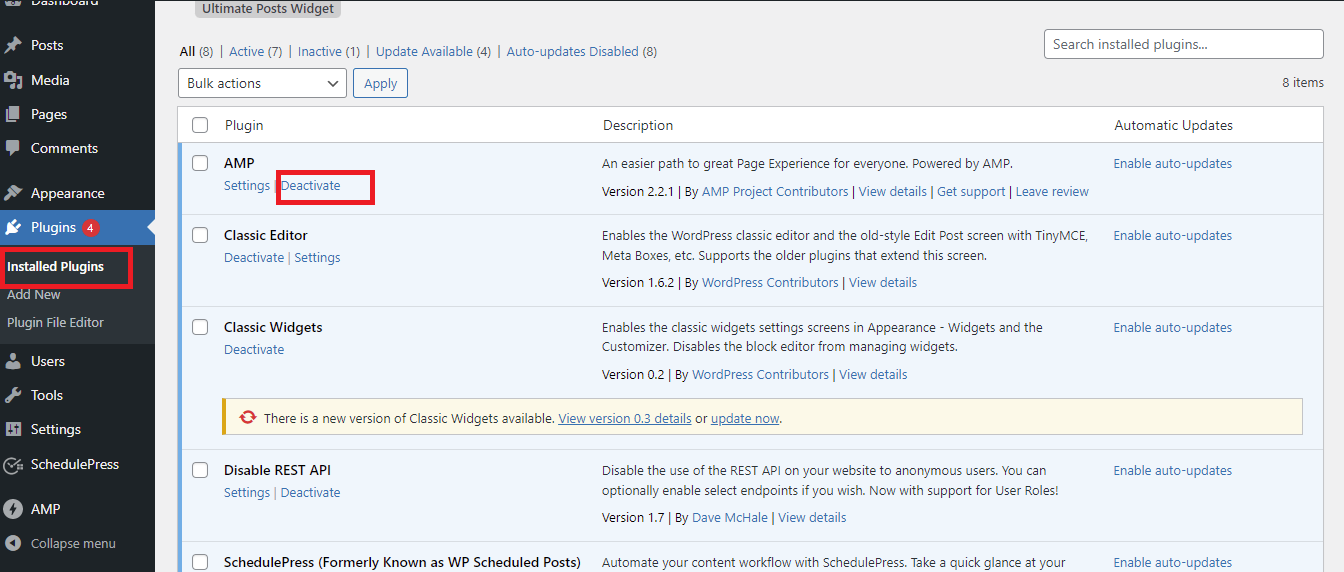
Step 1: Turn off Google AMP in WordPress
Just click Installed Plugins under Plugins. Next, let’s find the AMP plugin and click the “Deactivate” link that appears next to it.
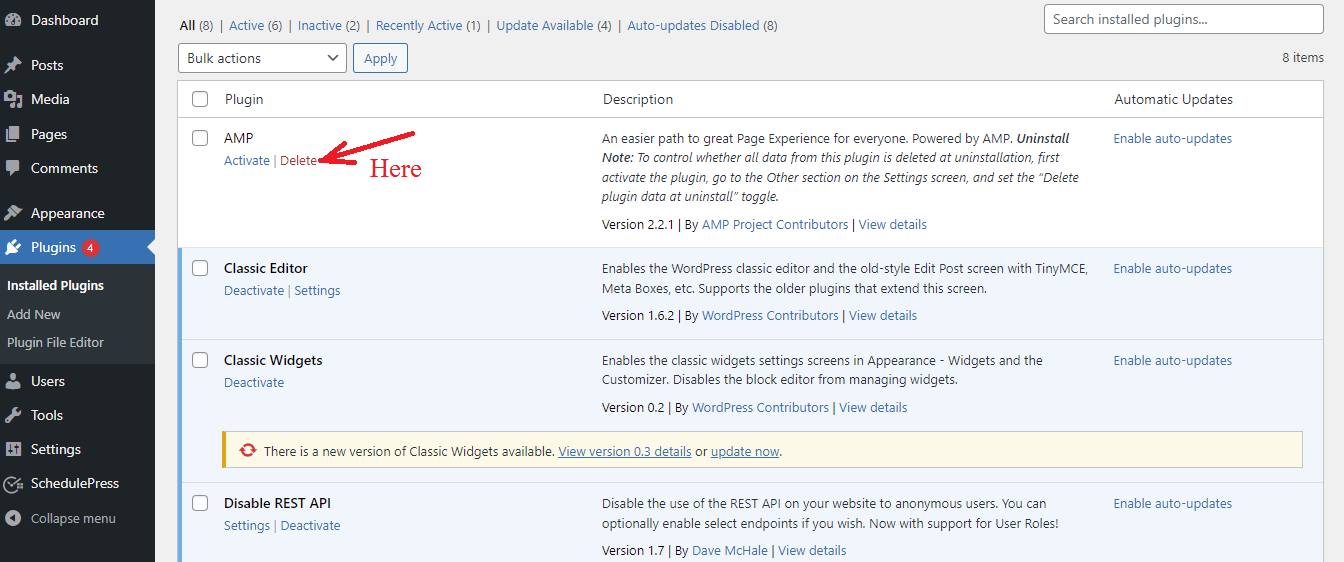
Let’s continue clicking on the “Delete” link to remove the plugin from WordPress after it has been deactivated. Additionally, this maintains your website tidy.
Step 2: Setting up redirects
You’ve just finished the first stage of the procedure. The traffic from AMP pages must now be diverted to your non-APM pages. Additionally, users that use mobile devices access your page marked as an “AMP” if you don’t generate a redirect. Your visitors will undoubtedly see a 404 error page. It is now appropriate for you to configure a 301 redirect in WordPress.
Method 1: Using a plugin to create a redirect in WordPress
The Redirection plugin is the one we’d like to suggest. It is one of the most outstanding WordPress redirect plugins available. This application makes it simple to manage 301 redirects and track 404 problems. Additionally, it might help you cut down on errors and raise the rating of your website.
Installing and activating the plugin is the first step. For additional help, you can follow these steps to install a WordPress plugin.
Step 1: Plugins » Add New.
Step 2: Type the Plugin name in the “Search” box
Step 3: Click the “Install Now” button.
Step 4: Click on the activate plugin link to activate the plugin
Let’s go to the Tools > Redirection page after the plugin has been activated.
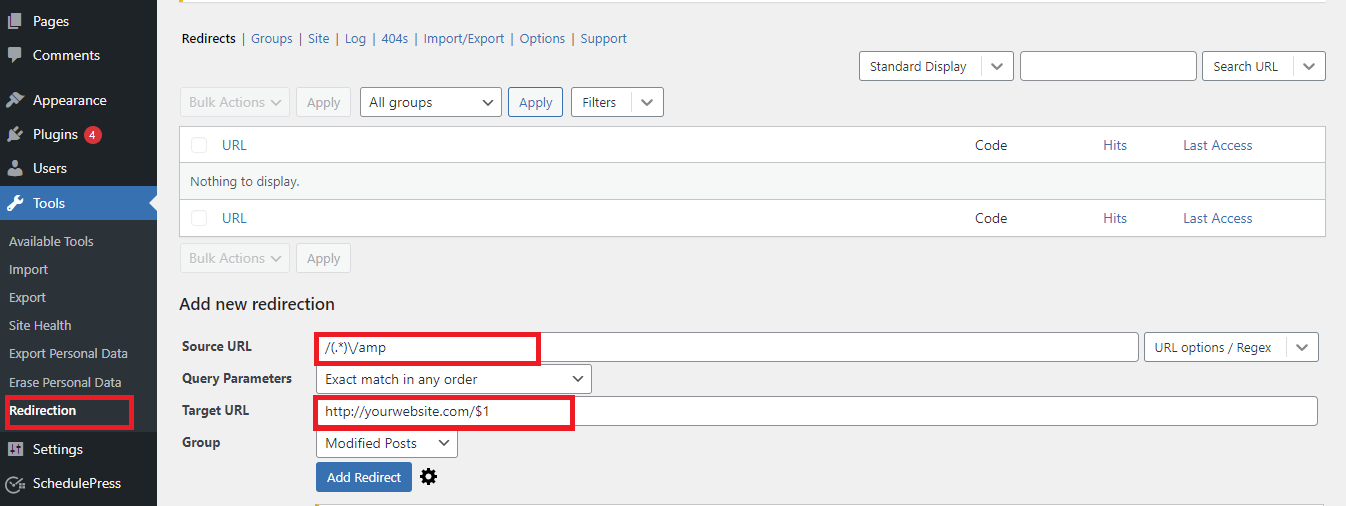
You must now fill out the Source URL field with the following code.
/(.*)\/amp
Then enter the URL of your website that is comparable to the one below in the Target URL section.
http://yourwebsite.com/$1
Don’t forget to replace “your website” with your own domain name in our example.
You must select the “Redirections” option from the drop-down menu under the “Group” section.
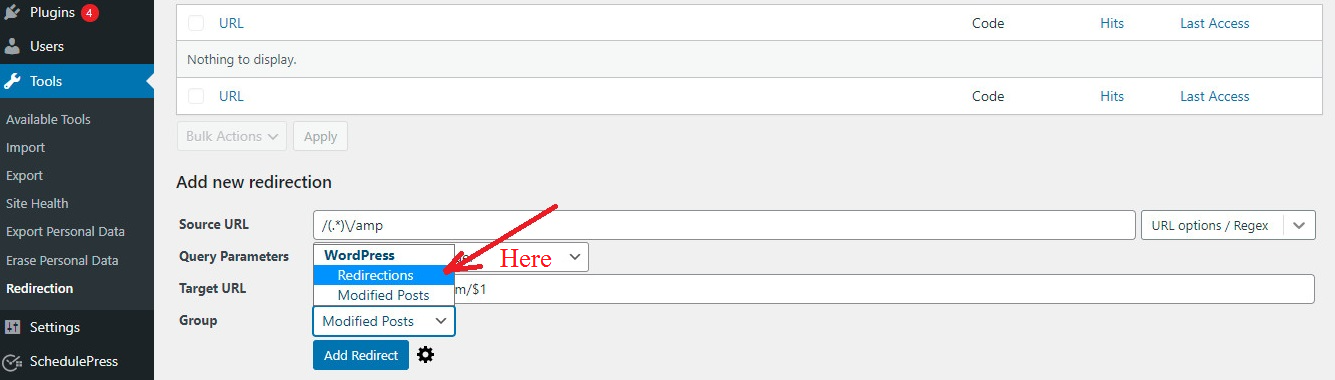
To complete the process, click “Add Redirect” at the end.
Users will now be forwarded to your actual website page anytime they visit an AMP page.
Method 2: Manually set up redirects in .htaccess
Using the .htaccess file on your WordPress hosting account is another approach to assist you in creating redirects without the need to install any additional plugins.
You can use an FTP program or the File Manager in cPanel to connect to your website initially. After connecting, you must locate and change the .htaccess file in the root directory of your website.
The following code needs to be added at the end of your .htaccess file.
// Redirect AMP to non-AMP
RewriteEngine On
RewriteCond %{REQUEST_URI} (.+)/amp(.*)$
RewriteRule ^ %1/ [R=301,L
To complete the redirect, don’t forget to click “Save Changes.”
To sum up
To make it simple for you to turn off Google AMP in WordPress, we have prepared step-by-step instructions. Please feel free to discuss any difficulties you encounter when you turn off Google AMP in WordPress by posting a comment below. We’ll help you out as soon as we can.
Additionally, you may check out our collection of enticing, responsive, contemporary designs for your website on our Free WordPress themes page. They’ll give your website a fresh look and improved functionality.