Do you want to identify what is causing the error on your website? It is necessary to enable debug mode in WordPress to know the cause exactly and fast. In our blog, we will share with you 2 simple ways to handle this task. Let’s dive into it.
Why should you Enable Debug Mode in WordPress?
By default, WordPress disables debug mode to not to reveal important information on your website so that you can prevent hackers from exploiting crucial things and taking over your website.
However, in some situations, if you are not web professionals, you can enable Debug Mode to help you display plenty of PHP errors as well as potential warnings. Thanks to that, you can quickly determine the causes leading to the appearance of errors on your website. Then, you can contact a suitable support channel for assistance. Therefore, in today’s tutorial, we will provide you with 2 methods to help you easily enable debug mode in WordPress. Let’s check them out.
How to Enable Debug Mode in WordPress?
Method 1: Enable WordPress Debug Mode by using a plugin
Using a plugin is considered the easiest way to enable WordPress debug mode without being messy with your website’s PHP code.
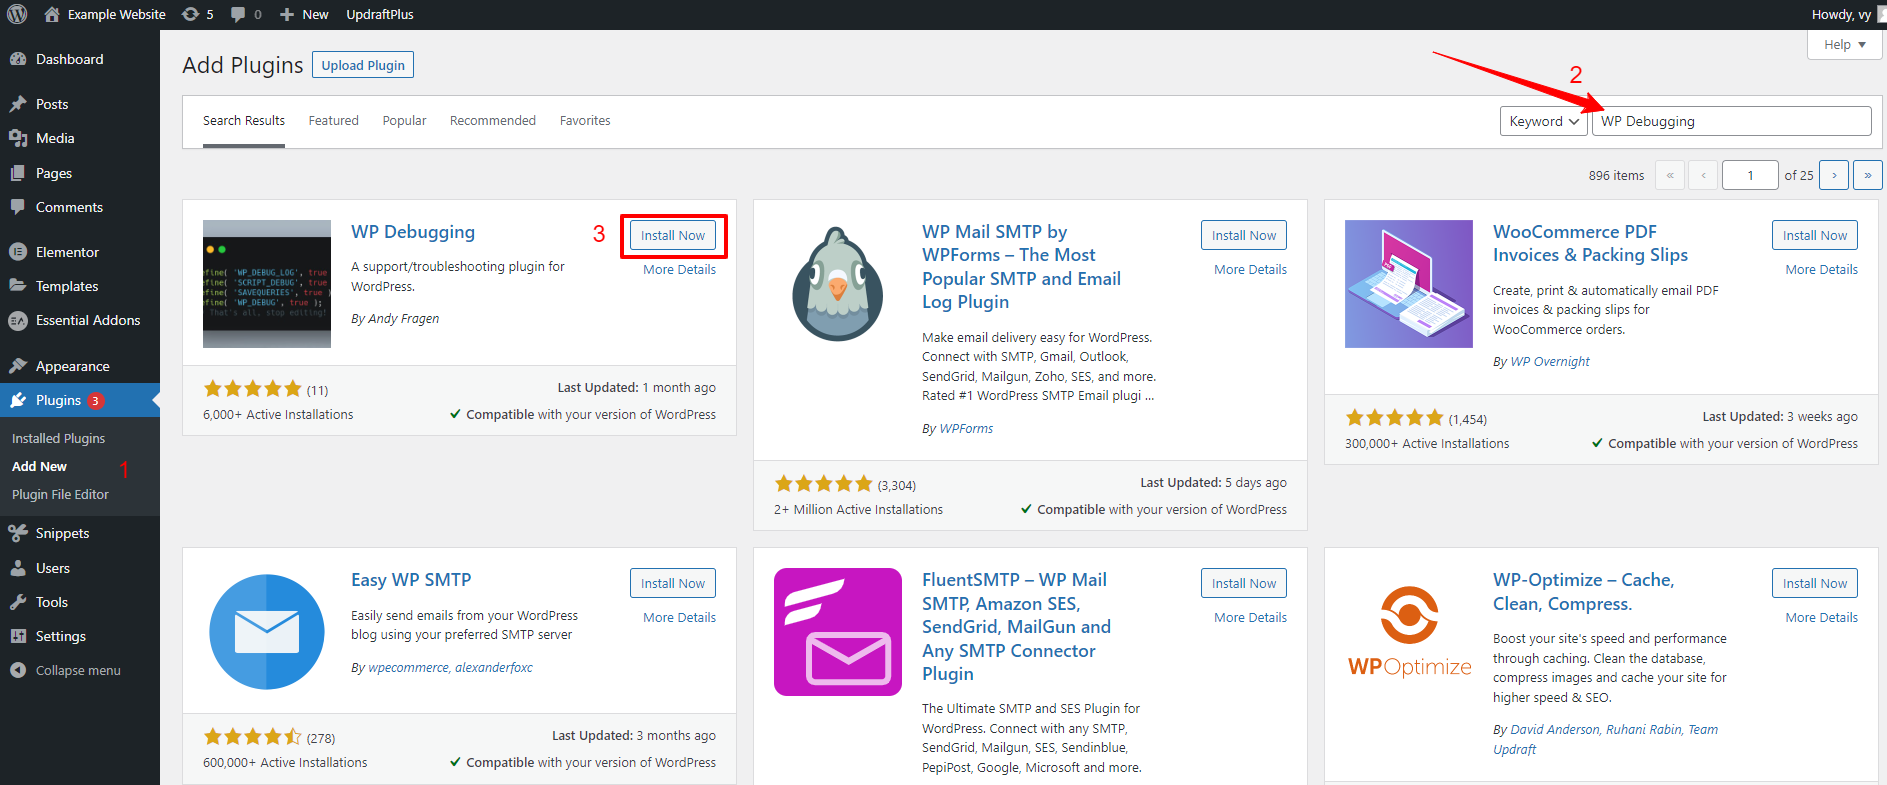
In order to use this method, first and foremost, you need to install and activate the WP Debugging by following the instructions below.
- Go to Plugins > Add New page from the WordPress dashboard.
- Type the plugin’s name on the search bar to find it.
- Then, click on the “Install now” button and “Activate” it.
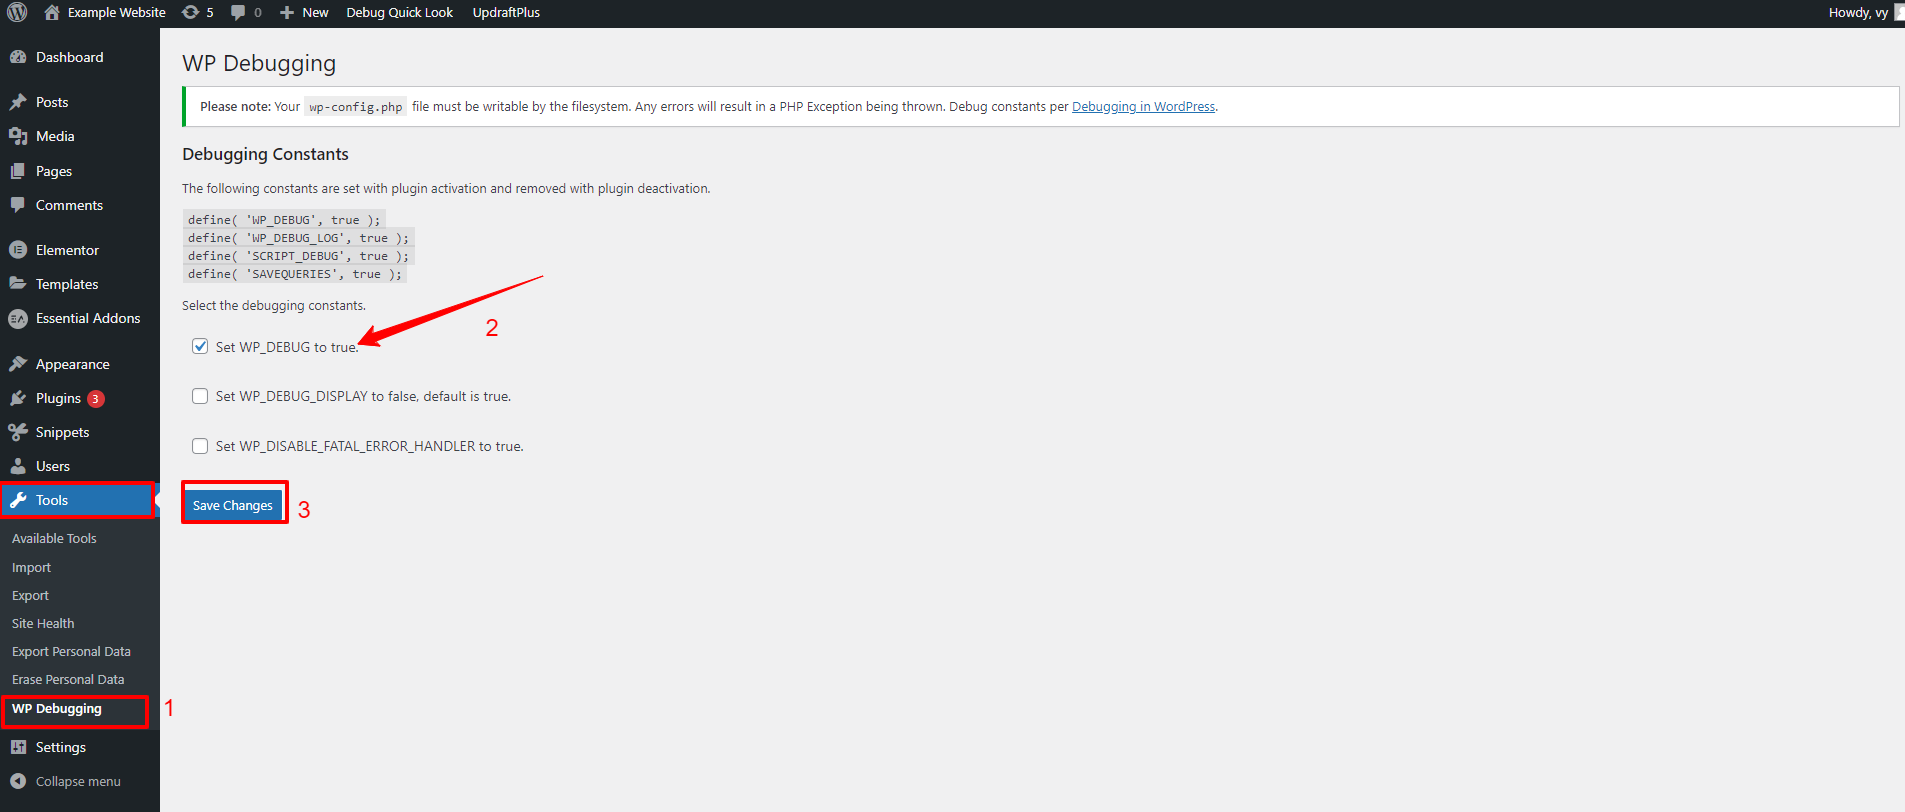
Once the plugin is activated, let’s go to Tools > WP Debugging and check the box next to the “Set WP_DEBUG to true” option. Then, don’t forget to click on the “Save Changes” button.
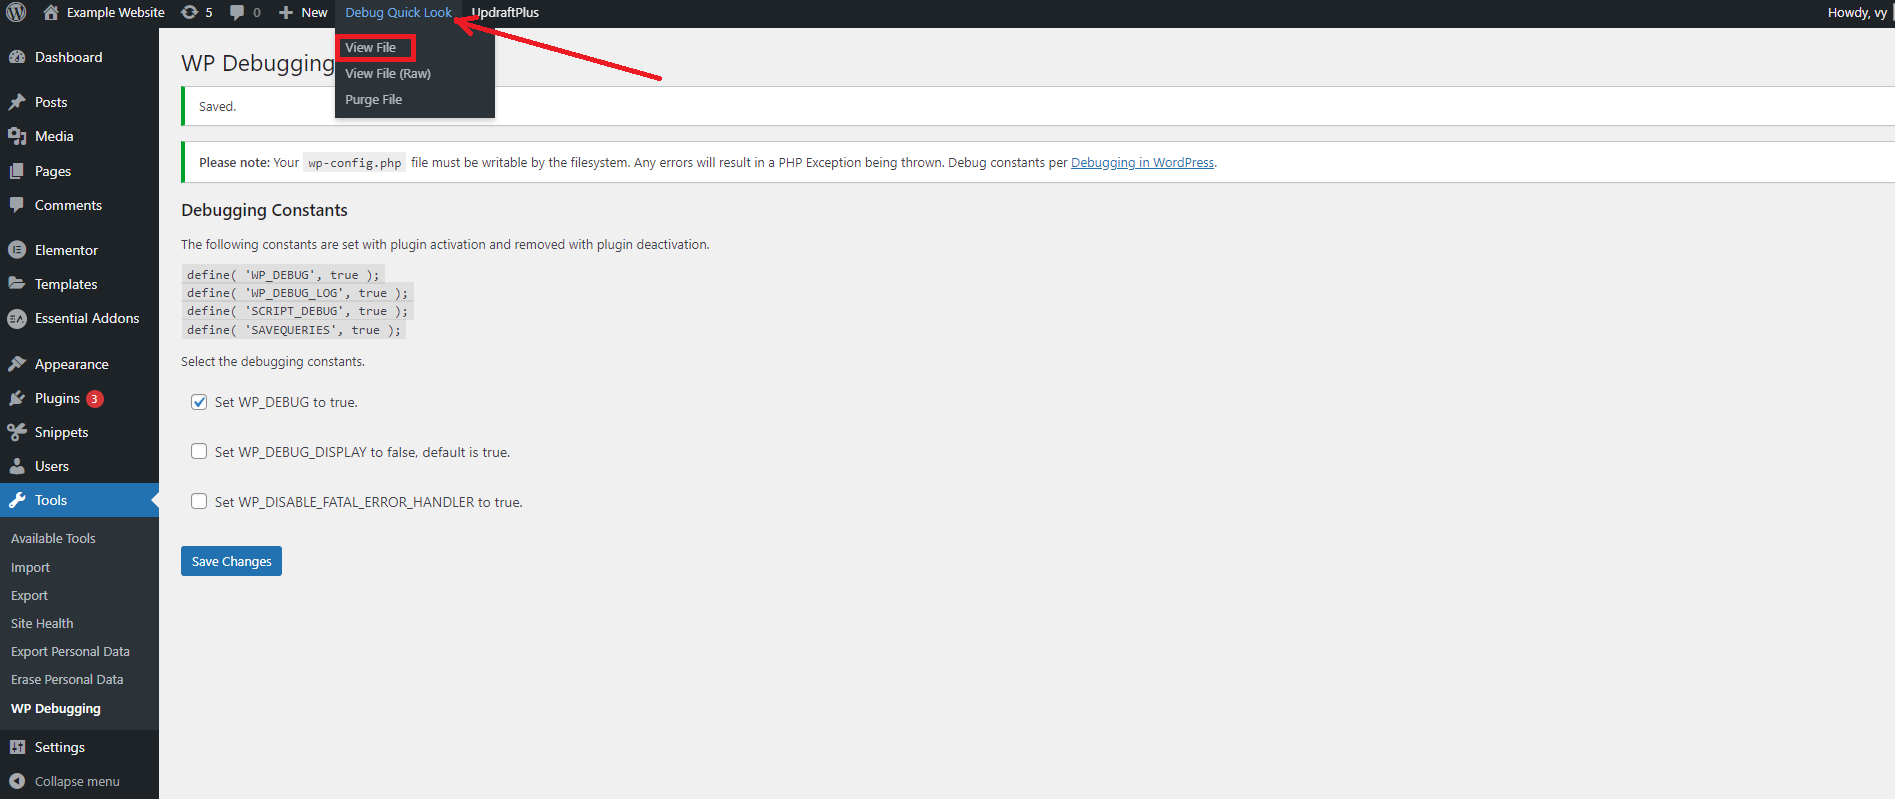
Now, all errors, notices, and warnings will be saved in a log. If you want to see them, simply click on the “Debug Quick Look” menu from your admin bar on top of your screen and choose the “View File” option from the drop-down menu.
This will open a new tab displaying the errors in the debug log.
Method 2: Enable WordPress debug mode manually
This method is suitable for those who have rich coding knowledge since it requires you to edit your wp-config.php file. However, before making any changes to your files, you need to back up the entire WordPress site by using WordPress backup plugins. Now, let’s track our instructions below.
The wp-config.php file is located at the root of your WordPress file directory. Hence, you can access this file from your hosting control panel or through an FTP client.
Next, let’s navigate to your WordPress site’s public_html root folder and find your wp-config.php file.
Now, to change the debug mode values to “true“, you need to add the following code before the code line that displays /* That’s all, stop editing! Happy blogging. */:
define( 'WP_DEBUG', true);
With this code, WordPress will show all PHP errors on the back and front ends of your website. However, you should not apply this method to live websites.
If you want to save this information, you can enable the debug log functionality by adding the following code.
define( 'WP_DEBUG_LOG', true);
After adding that code, WordPress will generate a debug.log file where your errors will be saved, you can access this file in your wp-content directory.
In contrast, if you want to disable debug mode, simply change its value to “false” as the following command.
define( 'WP_DEBUG', false);
The bottom line
Congratulations! You have successfully enabled debug mode in WordPress. We hope that you can complete this task without any difficulties. If you get into trouble, don’t hesitate to mention them below. We will support you as soon as possible.
Additionally, if you are finding a beautiful theme to make your website’s appearance, don’t miss a list of stunning, responsive, free WordPress Themes on our website.