Are you trying to figure out the best way to manage the number of archive months displayed in WordPress? Look no further; we will provide a thorough approach to resolving this issue in today’s blog.
Why do we need to restrict how many archive months are displayed on your website?
The organization of a list of posts under a particular post type, category, or tag depends heavily on archive pages. Your website’s visitors can read any content, including older entries, thanks to the feature, regardless of when it was published. Additionally, this feature helps with SEO because it makes it simple for search engines to find the older content on your website.
However, the displayed archives can take up a lot of room on your website if you have been posting a wide variety of entries for a long period. They also detract from the professionalism of your website.
The way to manage the number of archive months displayed in WordPress
In fact, there are numerous ways to let you manage the number of archive months displayed in WordPress. You can change functions.php or use WordPress plugins. We’re going to share with you both in today’s instructions. One of them can be used for your website. You can now review the techniques listed below to manage the number of archive months displayed in WordPress.
Method 1: Using Collapsing Archives plugin
Since you don’t have to touch a single line of code, this solution is appropriate for the majority of users.
To begin using this strategy, you must first install the Collapsing Archives plugin. This is thought to be one of the best WordPress archive plugins available.
Just navigate to your dashboard’s Plugins > Add New page. Then you may hunt for the “Collapsing Archives Plugin” using the search option. Click the “Install Now” button as soon as the plugin appears, then activate it.

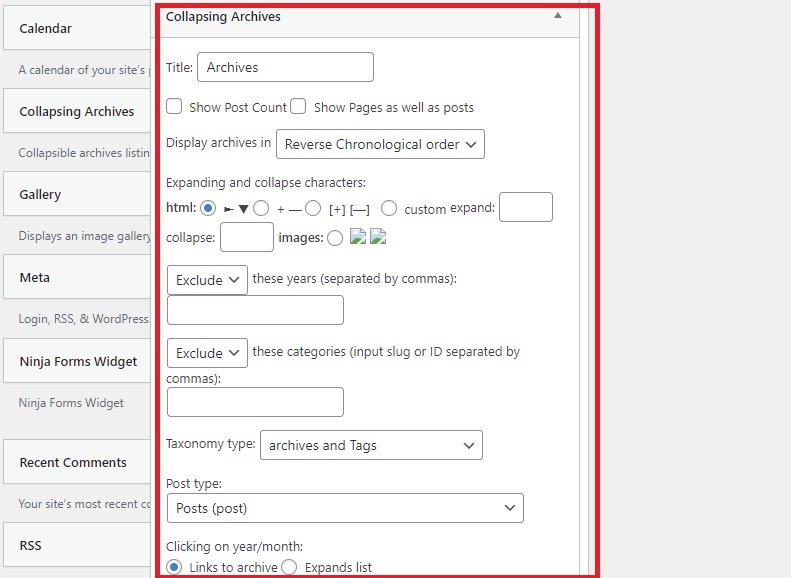
When the plugin has not yet been installed. To add the Collapsing Archives widget to your sidebar, go to the Appearance > Widgets page and click and drag it there.
The widget will instantly expand to show its settings. This plugin gives you a list of choices from which you can tailor it to your preferences. Even so, you have the choice of whether to link to the archive pages and whether to highlight particular pieces.
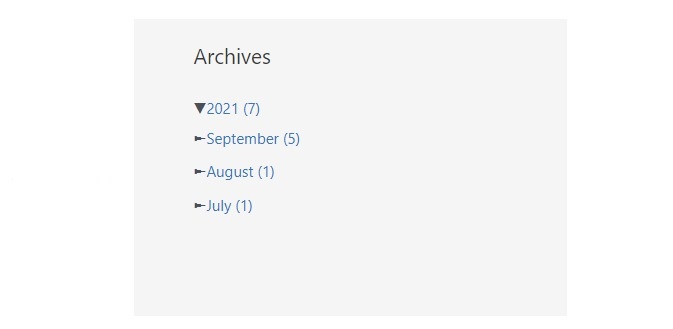
By utilizing this plugin, your visitors may easily read all monthly archives by clicking on years and expanding them. Additionally, this plugin fully enables you to make monthly archives collapsible and allow users to see post titles below.
Let’s click the “Save” button if you’re satisfied with your choice before leaving the widget page.
You can now verify the outcome on your website.
Method 2: Using the Compact Archives plugin
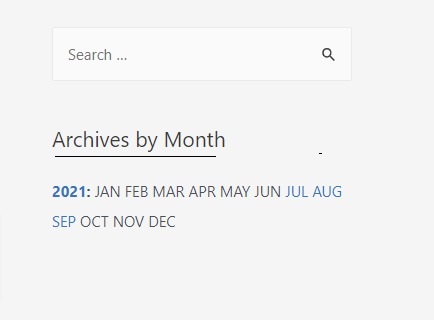
The Compact Archives plugin displays archive months in a condensed, legible structure as opposed to the customary large list, giving your website a more polished appearance.
Similarly to that, you must first install and activate this plugin before using it.
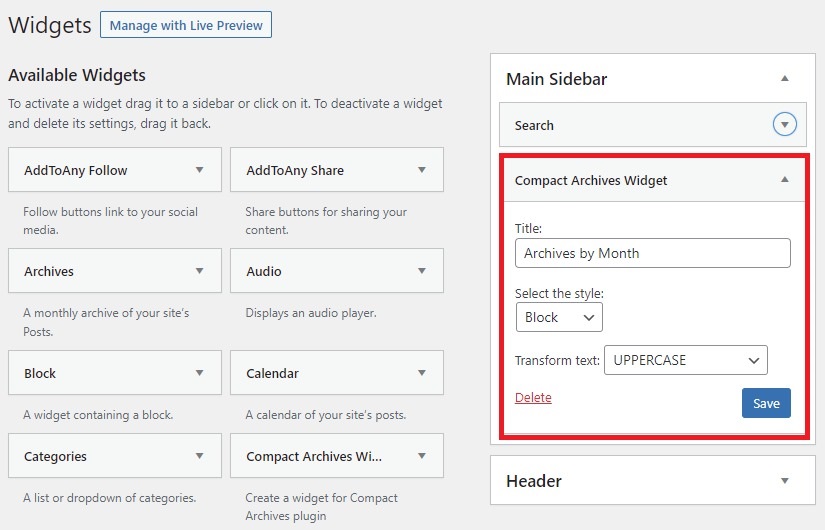
You must visit the Appearance > Widgets page after activation. The “Compact Archives Widget” will then be moved to your sidebar.
The next step is to provide a title for the archives, select the style by clicking the arrow, and then transform the text by clicking the “Save” button.
Now when you visit your website, the small archives are there.
Method 3:Editing functions PHP to control the archive months
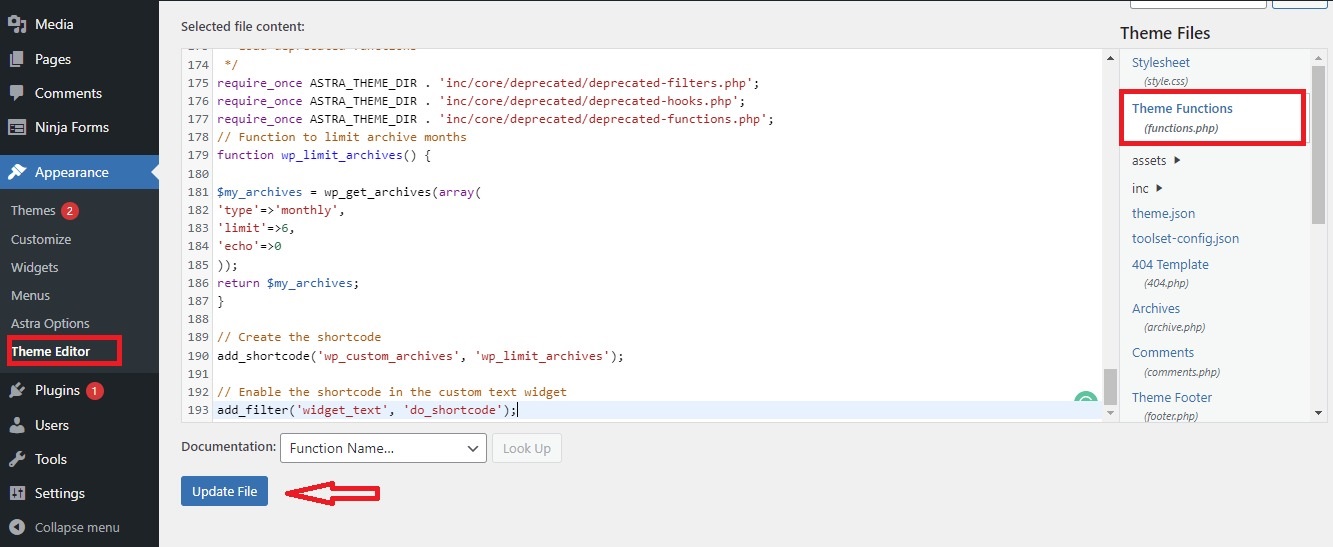
By making changes to your theme’s function.php file and then including a unique text widget in the sidebar, you can limit the archive months using this technique.
Logging into your WordPress dashboard is the first step. Then, select Appearance > Theme Editor and select Theme Functions (functions.php).
Then click Update File after adding the following lines of code to functions.php.
// Function to limit archive months
function wp_limit_archives() {
$my_archives = wp_get_archives(array(
‘type’=>’ monthly’,
‘limit’=>6,
‘echo’=>0
));
return $my_archives;
}
// Create the shortcode
add_shortcode(‘wp_custom_archives’, ‘wp_limit_archives’);
// Enable the shortcode in the custom text widget
add_filter(‘widget_text’, ‘do_shortcode’);
The Text widget is then added to your sidebar by dragging it from a list of available widgets on the Appearance > Widgets page.
You need to give the sidebar widget a title now. Then, enter the following code in the text editor by clicking the Text tab.
<ul>
[wp_custom_archives]
</ul>
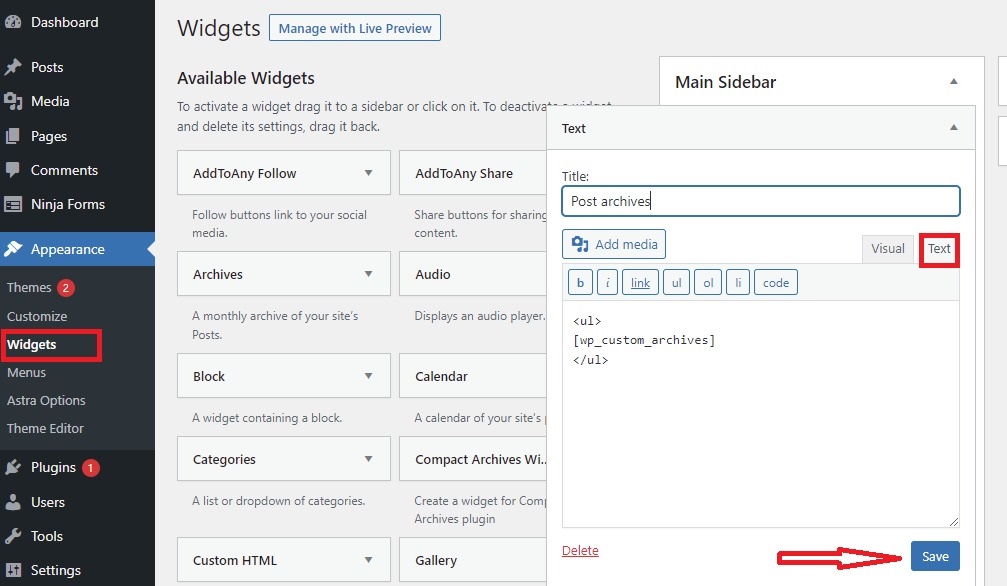
To save your widget, don’t forget to click the “Save” button. Your WordPress website will now display the results of your customized text widgets.
Summary
Have you chosen your preferred website measurement? This post should have provided a lot of helpful ideas to manage the number of archive months displayed in WordPress for your website. Please feel free to leave a remark below with any questions you may have.
It’s time for you to check out our collection of gorgeous, SEO-friendly designs that are ideal for many different websites by visiting our Free WordPress themes page.
