
In this blog, we will show you step-by-step guidance of how to export your WordPress site. Check out right now to enhance your WordPress skill.
Why do you need to export a WordPress site?
If you need to export your WordPress site in order to create a tar.gz or zip file backup of your site, you may need to migrate your site to a new domain or web host. Then, you can easily restore everything from your old website to your new one, including the database, media files, plugins, and themes.
How to export your WordPress site?
WordPress Exporter Plugins can assist you in exporting your website effectively in addition to the manual method currently available. The easiest way is to use plugins if you don’t have any technical knowledge. Additionally, it runs more smoothly than other methods. With our blog, you will find that to export your WordPress site is not the big deal for you anymore.
Our tutorial today will walk you through two methods for exporting your WordPress site:
- Using the navigation menu’s built-in tools.
- Third-party plugins allow you to export your website.
Solutions
Method 1: Export your WordPress site using the build-in Export tool
Following are the steps you need to follow to export your site from the navigation menu.
Step 1: Start by visiting your dashboard and clicking Tools > Export. In the export section, you have the following options:
- All content: Export all content related to Posts, Pages, Menus, Custom fields, and Custom Post Types.
- Posts: Using this feature, you can export posts and the content associated with them.
- Pages: Only page-related content can be exported from Pages.
Step 2: Select the type of exported data.
Step 3: Now that you have made your choice, let’s click on the Download Export File button.
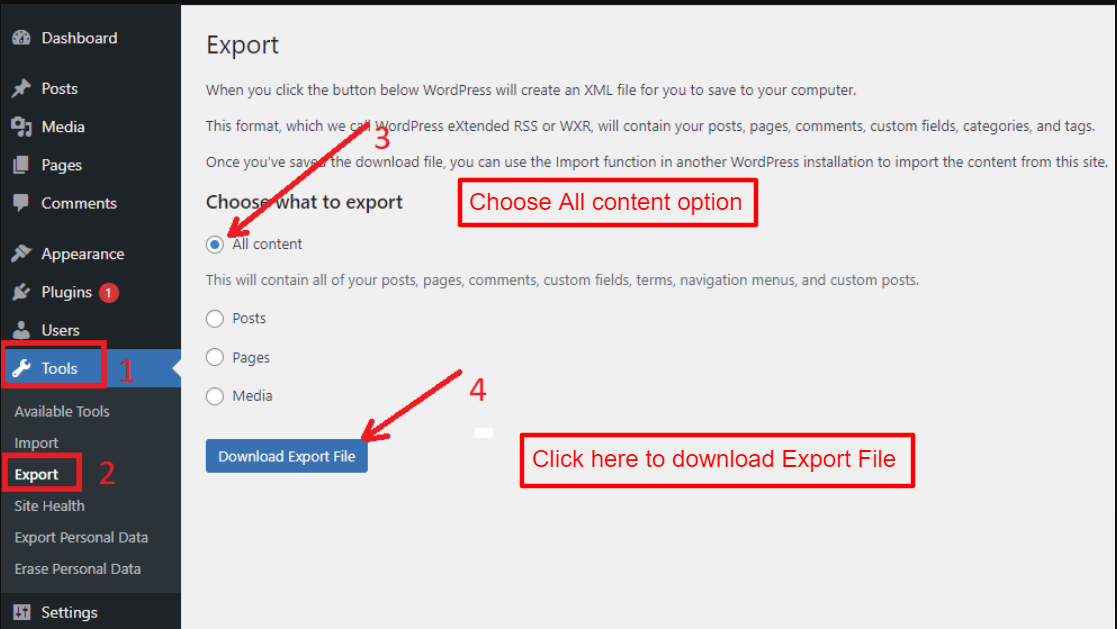
You will be downloading a .xml file at the moment
Follow these steps if you wish to upload this export file to the new site:
Step 1: Become a member of the new site you wish to import
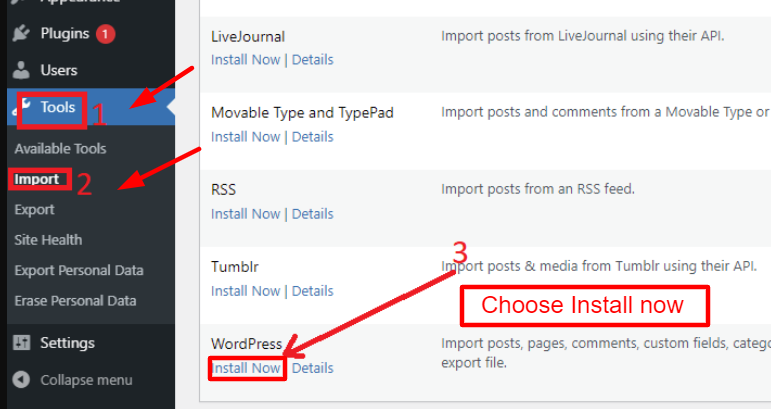
Step 2: Select Tools>Import. Upon clicking this, you will be directed to the import screen
Step 3: On the bottom of the screen, you will find the WordPress option. “Install Now” should be clicked.
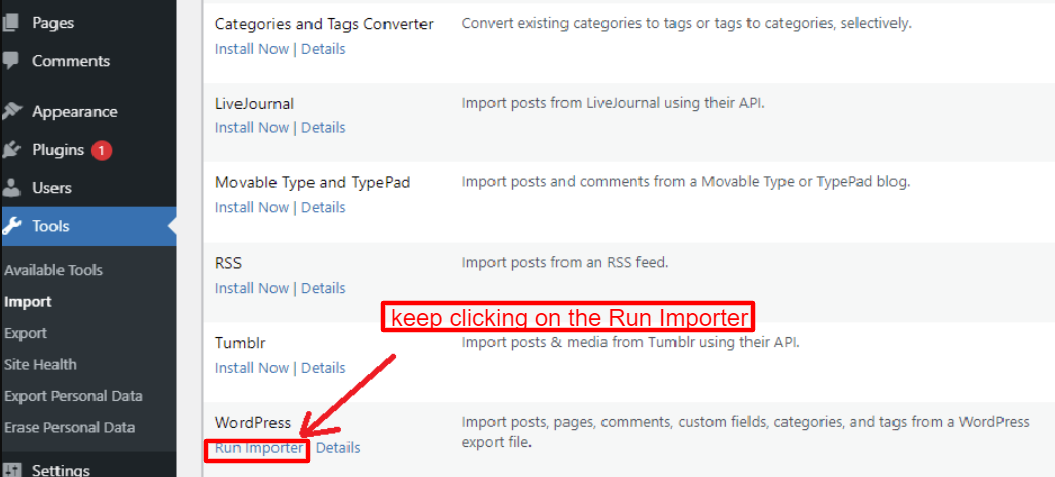
Step 4: Click on Run Importer after installing. You will be taken to the upload page.
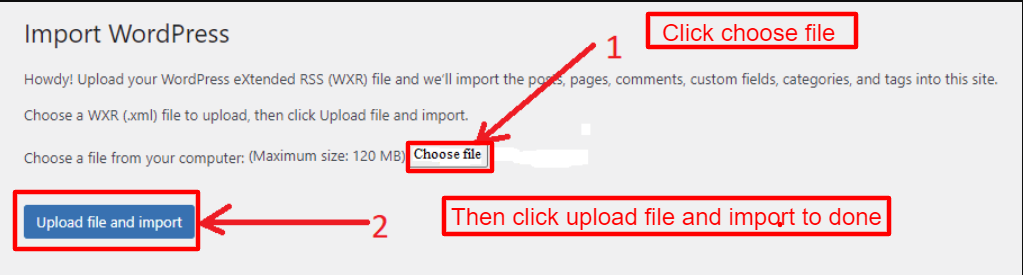
Step 5: After selecting your file from your computer, click the Upload file and import button and then choose your file.
While this method is generally quite easy to use, one of its greatest weaknesses is that it requires a lot of steps and stages. Due to this, most developers have released tools that will help you migrate from one hosting provider to another within minutes. In the next section, we will demonstrate this.
Method 2: Using UpdraftPlus Plugin to export your WordPress site.
In the world of scheduled backup plugins, UpdraftPlus is regarded as one of the most popular WordPress Backup Plugins. UpdraftVault, Rackspace Cloud, FTP, DreamObjects, and many other popular remote cloud storage providers are integrated into this application. Additionally, it creates backups of your site automatically. We
Continuing with the steps below, we can export our WordPress site easily.
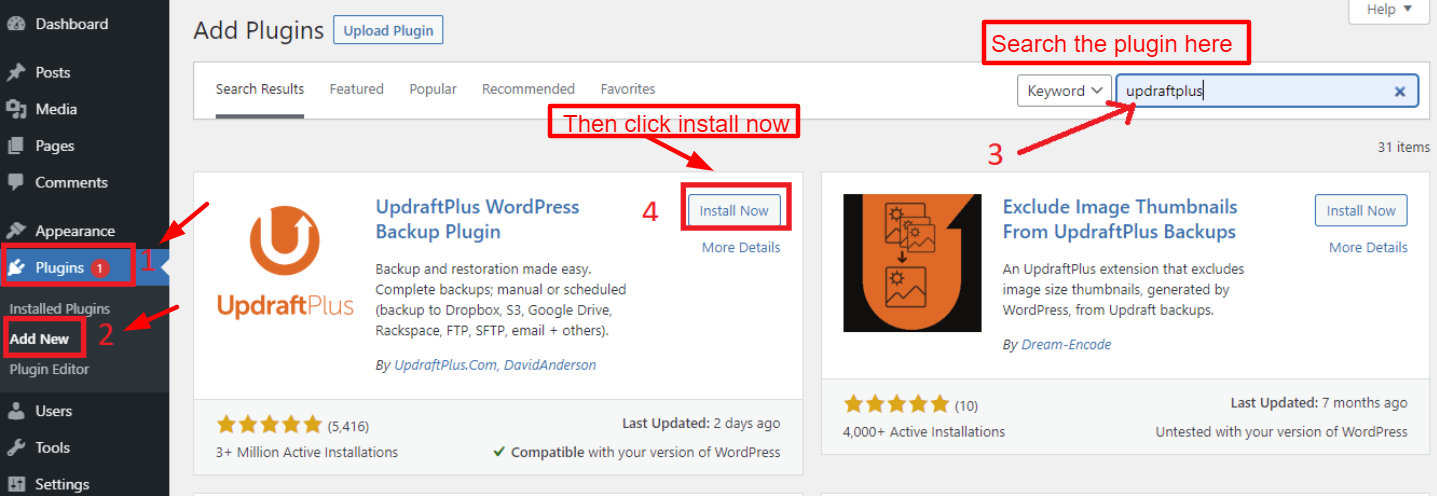
Step 1: UpdaftPlus plugin must be installed and activated
Installing and activating it is similar to other plugins. You can search for the plugin in the search bar by going to Plugins > Add New. Activate it quickly by clicking the Install Now button.
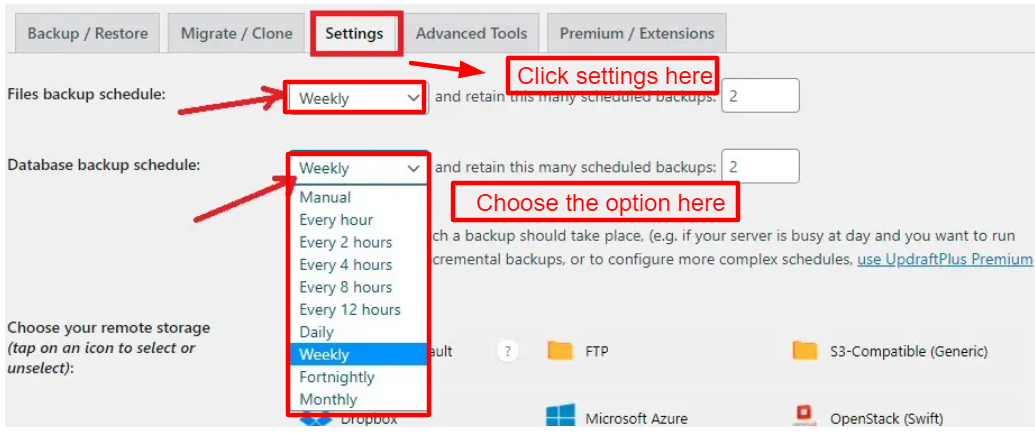
Step 2: The steps for configuring settings are as follows:
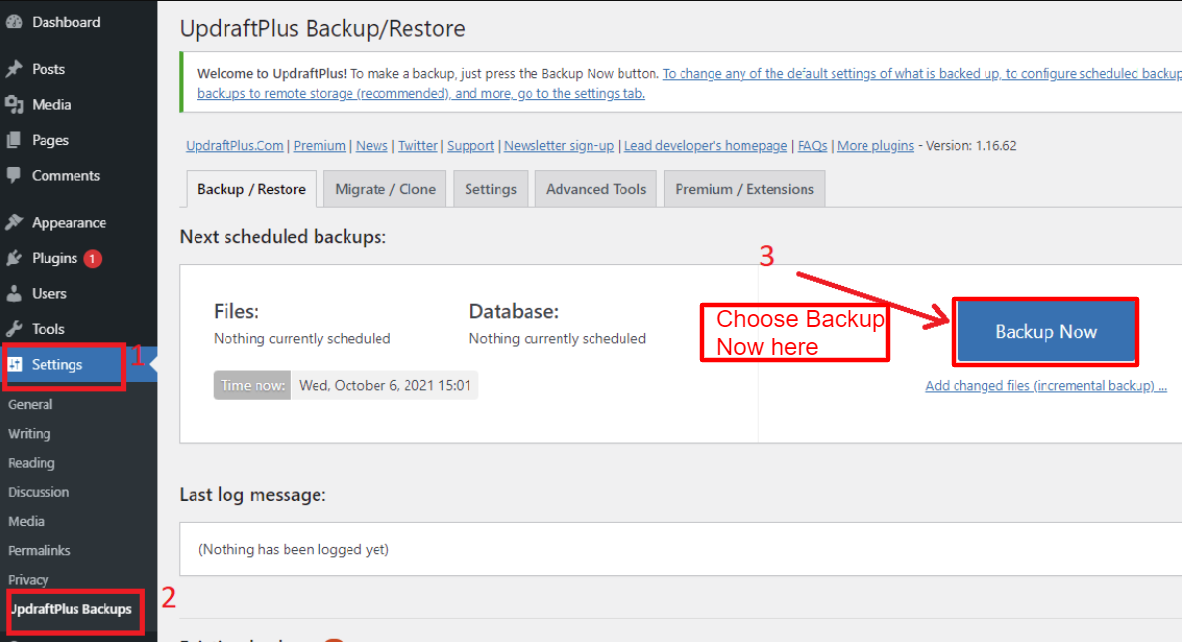
- Under the WordPress navigation menu, go to Settings > UpdaftPlus Backups. Select Settings from the menu.
- The drop-down menus allow you to schedule file backups and database backups. Depending on your site, you should select the appropriate option.
- Scheduled backups can be increased or decreased at your discretion.
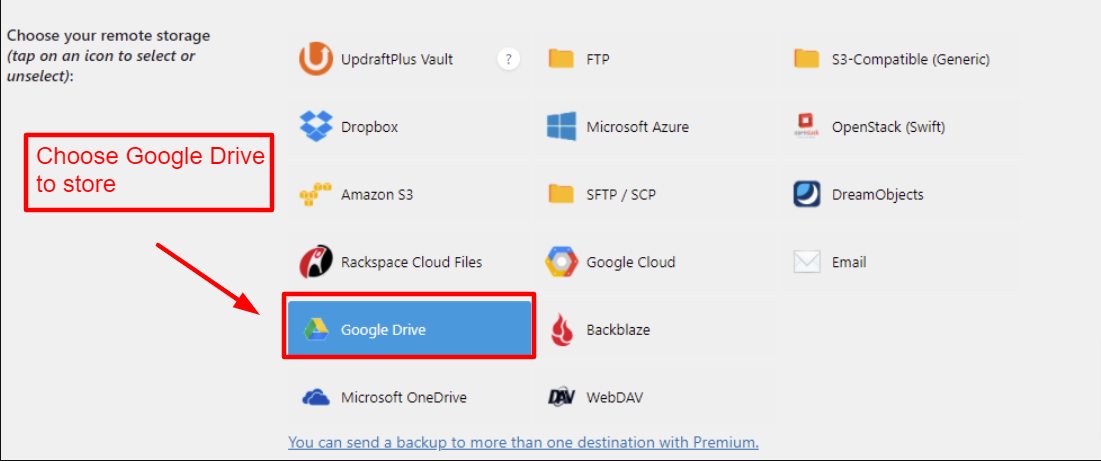
Choose where you’d like your files to be stored by scrolling down the screen. It is possible to integrate UpdraftPlus with a variety of remote storage options.
4. Your backups should be stored in a location of your choice. Google Drive is the option we prefer in our example.
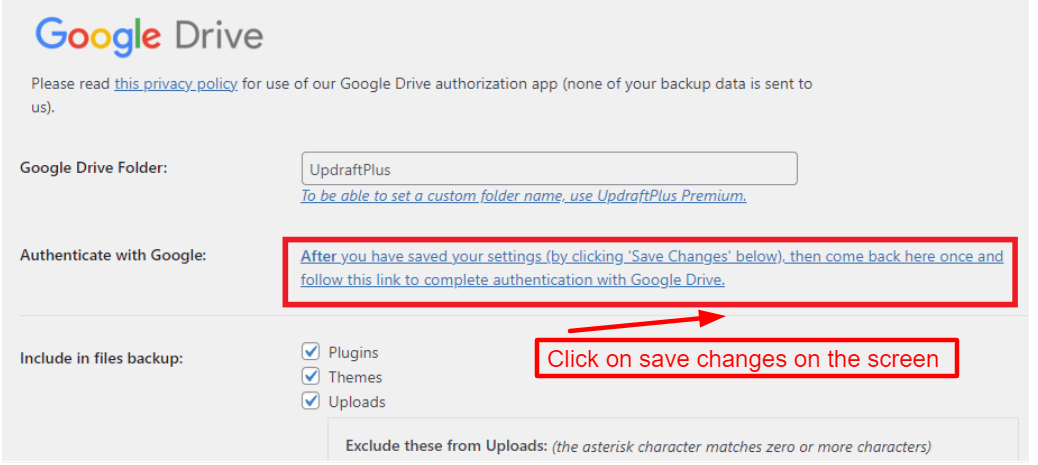
Depending on the remote cloud storage service you select, you will receive instructions specific to that service. At the bottom of the screen, click on Save Changes to save your changes.
Step 3: Make a backup of your site.
Now that your storage location is set up, you can start storing your files. With UpdraftPlus, your website will be automatically backed up without you having to do anything.
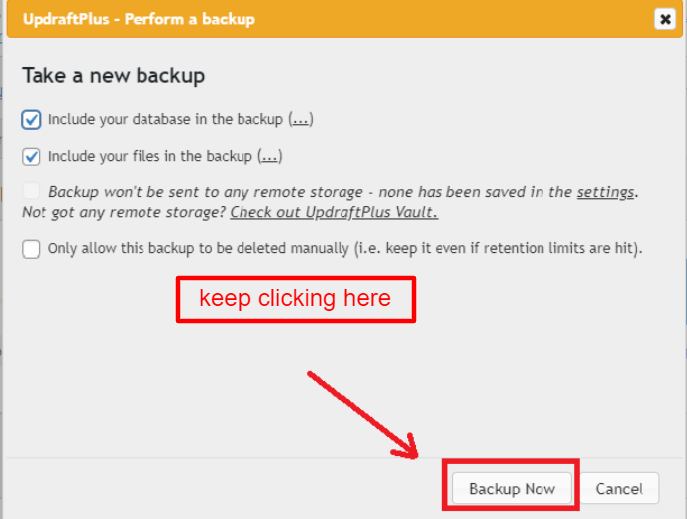
The Backup Now button allows you to create a backup manually at any time.
The popup window appears as shown in the screenshot below. Database/file backups can be selected here and whether backups should be sent to remote storage can be decided. Once you have clicked on Backup Now, keep clicking it.
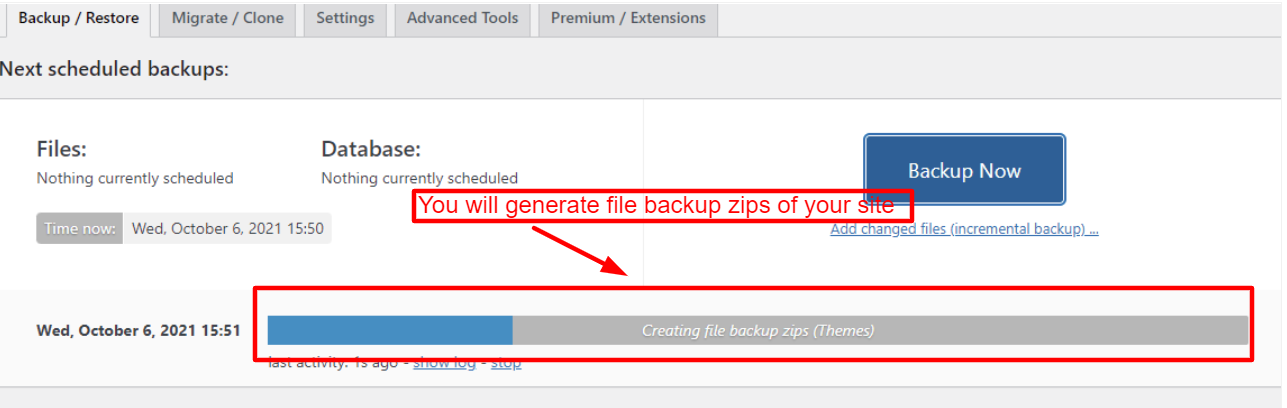
Your site will be backed up in zip format by UpdraftPlus after that.
At the bottom of the page, scroll down until you see Existing backups after completing the backup process. Click on each button as shown in the screenshot below to download it onto your computer.
Additionally, you can restore Backup data by clicking the blue Restore button below the Actions section.
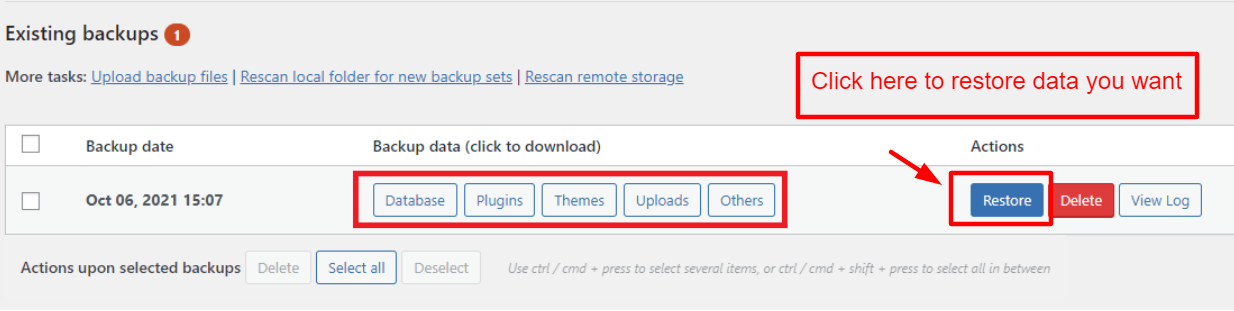
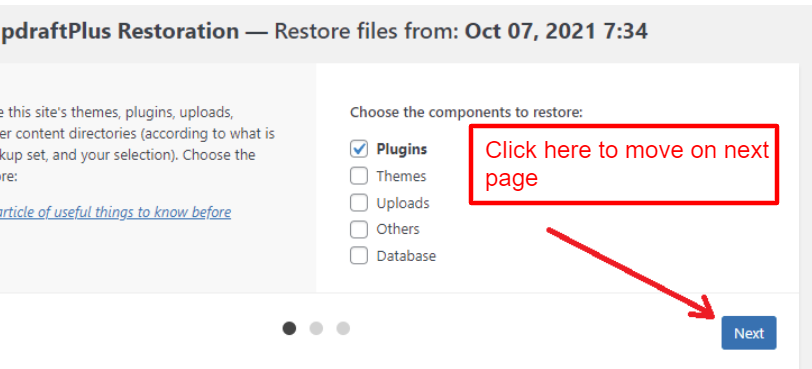
Upon clicking this, a popup window will appear. In this section, you can select which database elements you want to restore. You can then move to the next page by clicking on the Next button. To proceed, let’s click Restore again.
The restore will be successful once it has been completed, and a message will appear.
Conclusion
It is very simple to Export your WordPress site. Don’t hesitate to explore our Free WordPress Themes if you’re seeking a stunning and proactive design to make your website more appealing and professional.