If you write frequently, you’ve probably been in a situation where you want you could undo something you did. There is a built-in feature for this called Post Revisions. It’s similar to a time machine that allows you to go back in time and fix your mistakes. If you don’t know how to undo changes in WordPress with Post Revisions, see this article for more information.
What are Post Revisions?
WordPress has a built-in feature called Post Revisions, which is vital for saving revision history for each post or page as you write. As you work on each draft, the system will automatically save a temporary version, generally known as auto-save mode. Autosaves are enabled for all posts and pages, but they do not overwrite previously published information.
Furthermore, when you make changes to your posts/pages, WordPress will store a copy of the site content every 60 seconds by default. This option, in particular, will assist you in saving your post whenever your power goes out or your internet connection is lost.
When you return to update that post, the system will display a warning informing you that a backup of your post exists, as well as a link to restore the backup. Autosaves are highlighted when you review revisions.
Why should you use Post Revisions?
As previously mentioned, post changes allow you to automatically save a copy of your content. It also allows you to switch between different states of your draft and make changes. As a result, you may easily manage the work of several authors.
You may also check who changed your article, what changes they made, and much more. In summary, WordPress Post Revision is a very useful function for your website.
How to Easily Undo Changes in WordPress with Post Revisions?
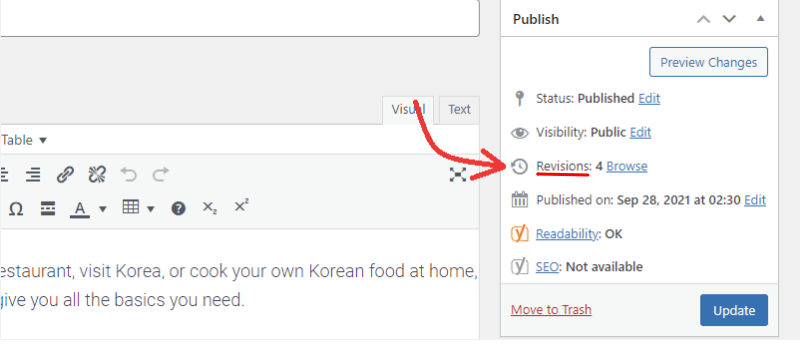
Let’s look at the right panel in the post/page edit screen if you’re still using the Classic editor. The number of revisions is displayed in the Publish Meta box by WordPress.
Now, if you click on the “Browse” link, it will take you to the post/page revisions screen.
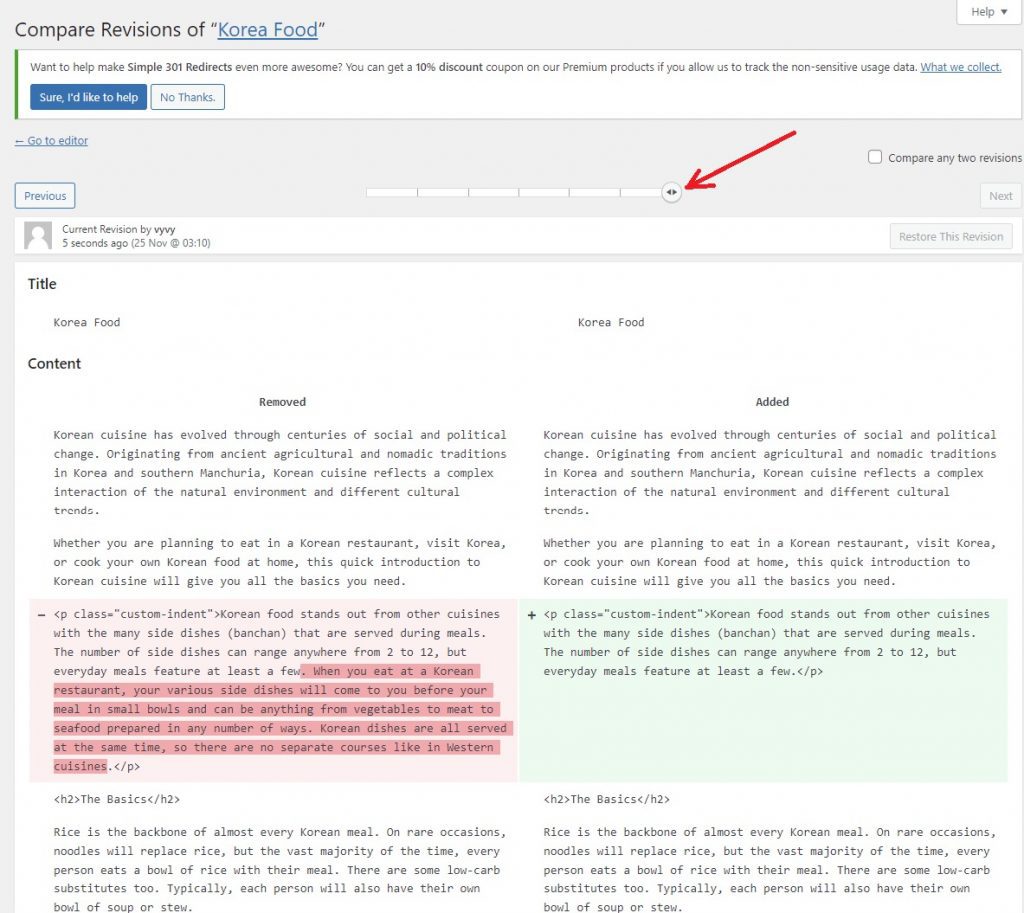
With a scroll bar on top, the post revision page displays the most recent revision of your post. When you move the scroll bar button, you will be taken to the previous revision of the post/page.
Aside from that, the post revision will highlight the removed text in the right column and the additional content in the left column. Each change will be highlighted in green and pink.
On the top, you will notice the author who made these changes, the time, and other information.
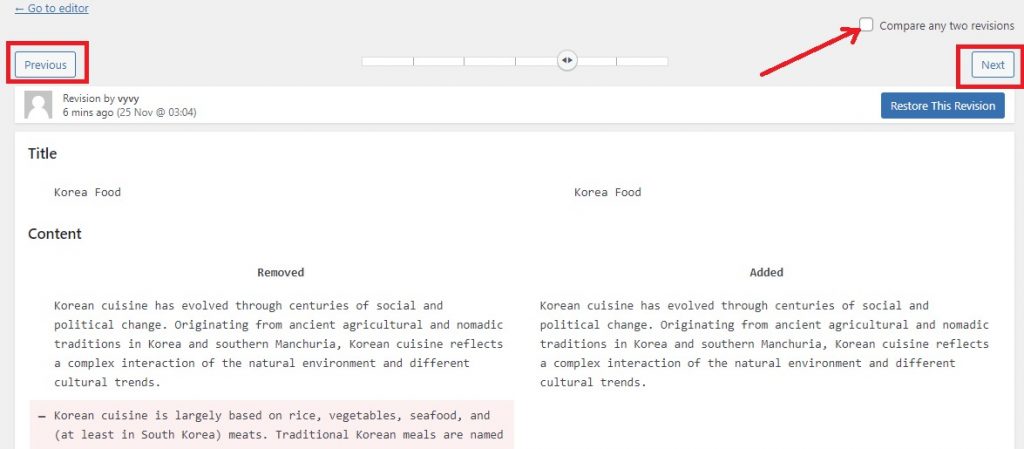
You may also use the “Previous” and “Next” buttons to navigate through revisions.
Examine the box at the top that displays “Compare any two revisions”
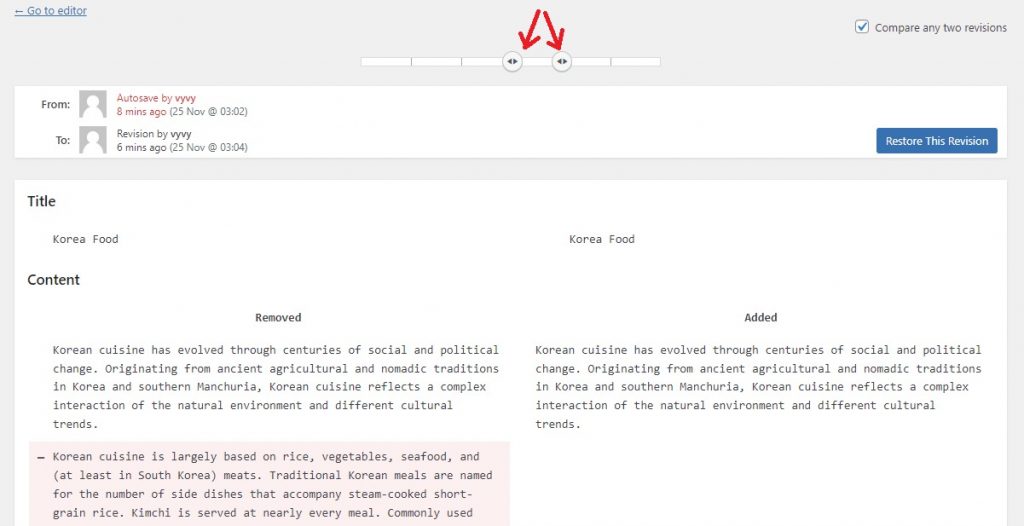
If you select this option, the post revisions will split the scrollbar button into two. Then, for each button, go to a different revision and compare the difference between two distant revisions.
Simply click the “Revision” or “Restore This Autosave” button to restore any revision. WordPress will instantly restore the selected revision as your current post revision, which you can save as a draft.

Furthermore, you may be confident that restoring an older revision will not remove the most recent version of your post.
How to use Post Revisions in the WordPress Block Editor( Gutenberg)?
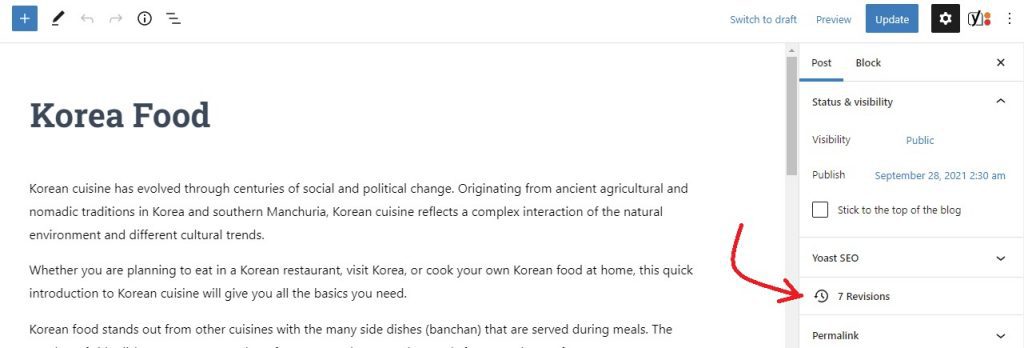
If you’re using WordPress’s new default editor, you can find post revisions in the Document panel on the post/page edit screen.
Click on “Revisions” to see the post revisions. Apart from this step, post revisions in Gutenberg function in the Classic editor in the same way.
Should you limit or disable the post revisions feature in WordPress?
You have complete control over the post revisions functionality, including the ability to limit and eliminate it. However, we strongly advise you not to disable this option because post revisions are quite useful in a variety of situations.
Several users think that having many revisions will slow down their websites. However, this is not correct. Because WordPress will skip post revisions when you perform database calls on the front end. It only looks for revisions on the post-edit screen or when you browse revisions.
WordPress allows you to control the number of revisions. In order to limit post revisions, you can add the following code to your WordPress site’s wp-config.php file.
For instance, we would like to limit the number of revisions to 10. You can change 10 to any number of revisions you desire.
define( 'WP_POST_REVISIONS', 10 );
If you still want to delete post revisions in WordPress for whatever reason, you can use the WP-Optimize plugin.
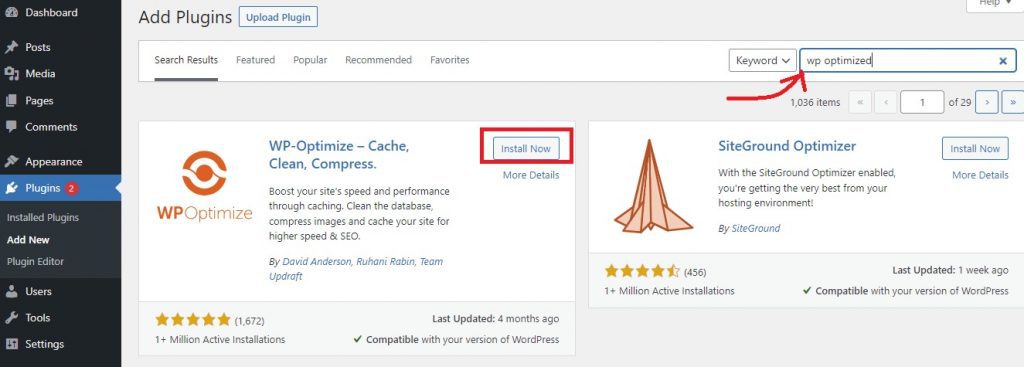
To begin, navigate to Plugins > Add New in your WordPress admin panel. Then you use the search box to find the plugin. Then, simply click the Install Now button to activate it.
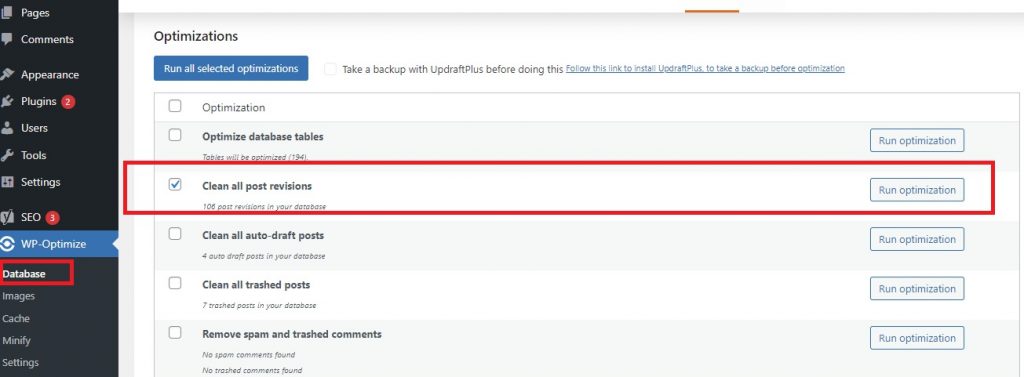
After installing the plugin, navigate to the WP-Optimize > Database page and click the option that displays “Clean all post revisions” Then, to remove all post revisions, click the “Run optimization” button.
Conclusion
That is all the information we want to share with you in today’s tutorial. Hopefully, this article can assist you in dealing with your issues. If you have any questions, please post them in the comments section below and we will respond as soon as possible.
Last but not least, you can explore hundreds of amazing designs for your website by visiting our free WordPress Themes.
