Introduction
WordPress is considered the most popular platform used by many web developers. Creating and managing article content is extremely easy and flexible with the utilities that WordPress brings. However, sometimes, it makes website owners feel difficult because it does not provide line breaks. As a result, content creators, bloggers, or article writers will have problems with line breaks. Besides, the readers feel inconvenient and difficult to follow the text posts. Therefore, we would like to suggest you some methods to help you generate a line break in WordPress step-by-step. Now, let’s check it out!
Solutions to generate a line break in WordPress
Today, we will show you 3 ways to create a line break in WordPress with clear instructions. They include:
- Create a line break with the ‘Enter’ key
- Manually add a line break with code
- Alter line or paragraph spacing with CSS
Creating a line break by pressing the ‘Enter’ key
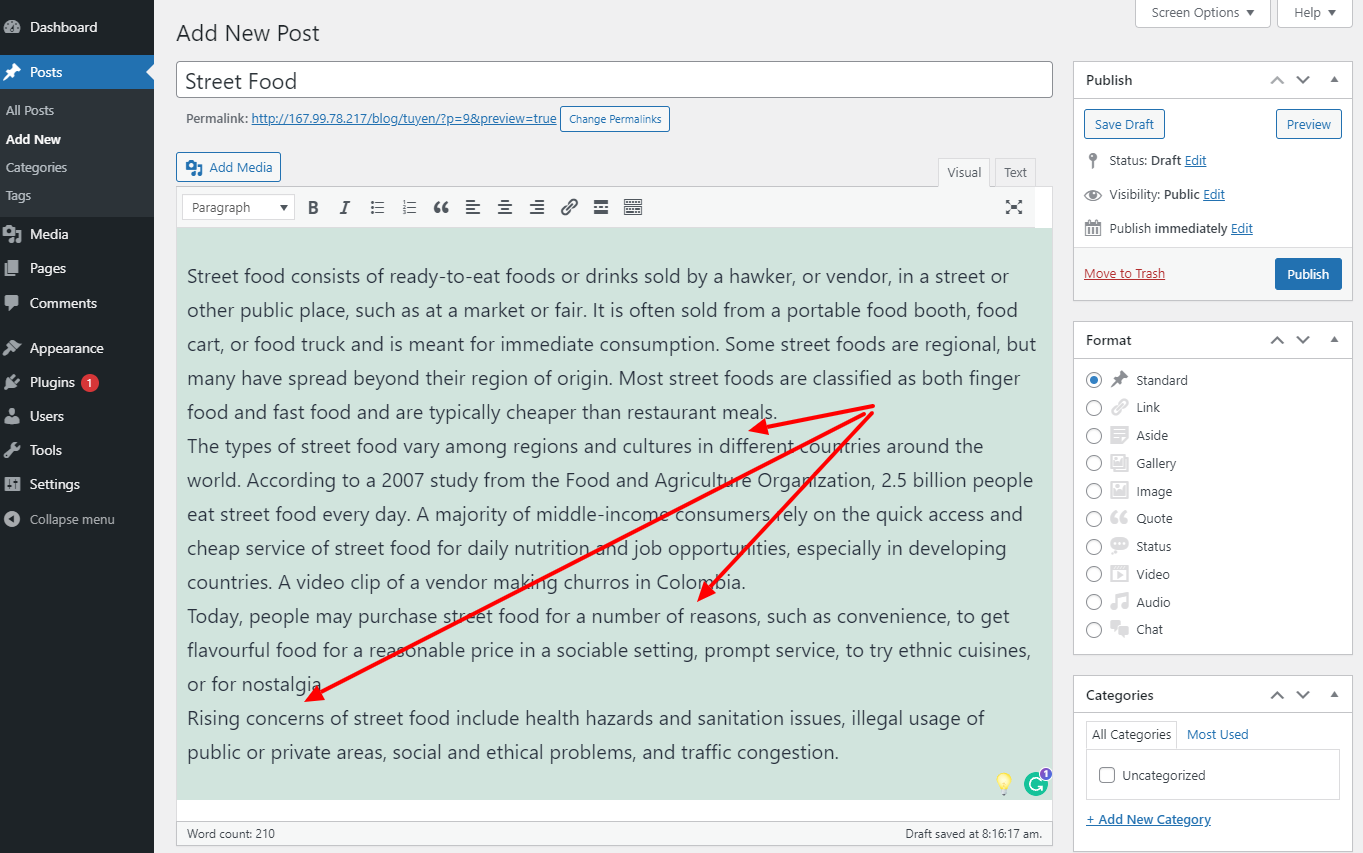
As you can see in the image below, there are no line breaks or larger spaces between paragraphs. This makes the reader feel confused and difficult to follow the post content easily. So, what need we do to improve this problem?
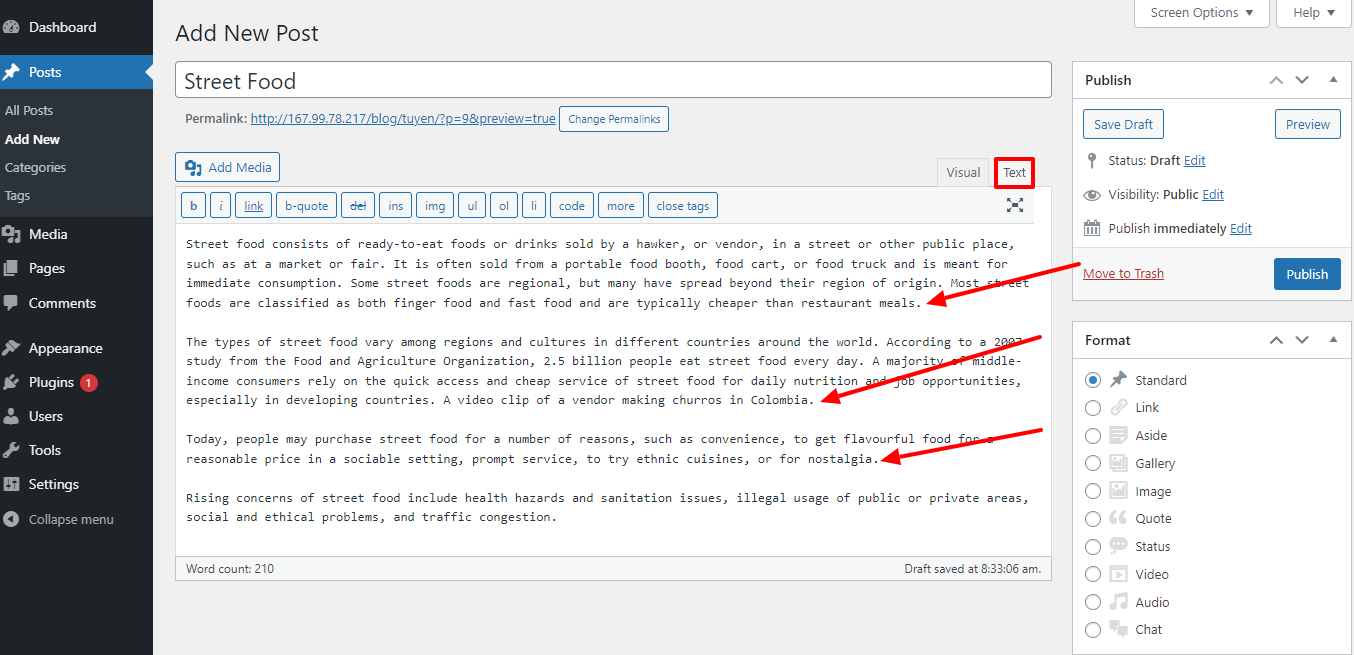
If you are using Classic Editor – a familiar WordPress Editor Plugin or other word processors, everything is very simple. You just need to click on the ‘Text‘ button. Next, after the dot ends each paragraph, you put the cursor in and press enter, a line break will appear below the text. Repeat this action with the rest of the text.
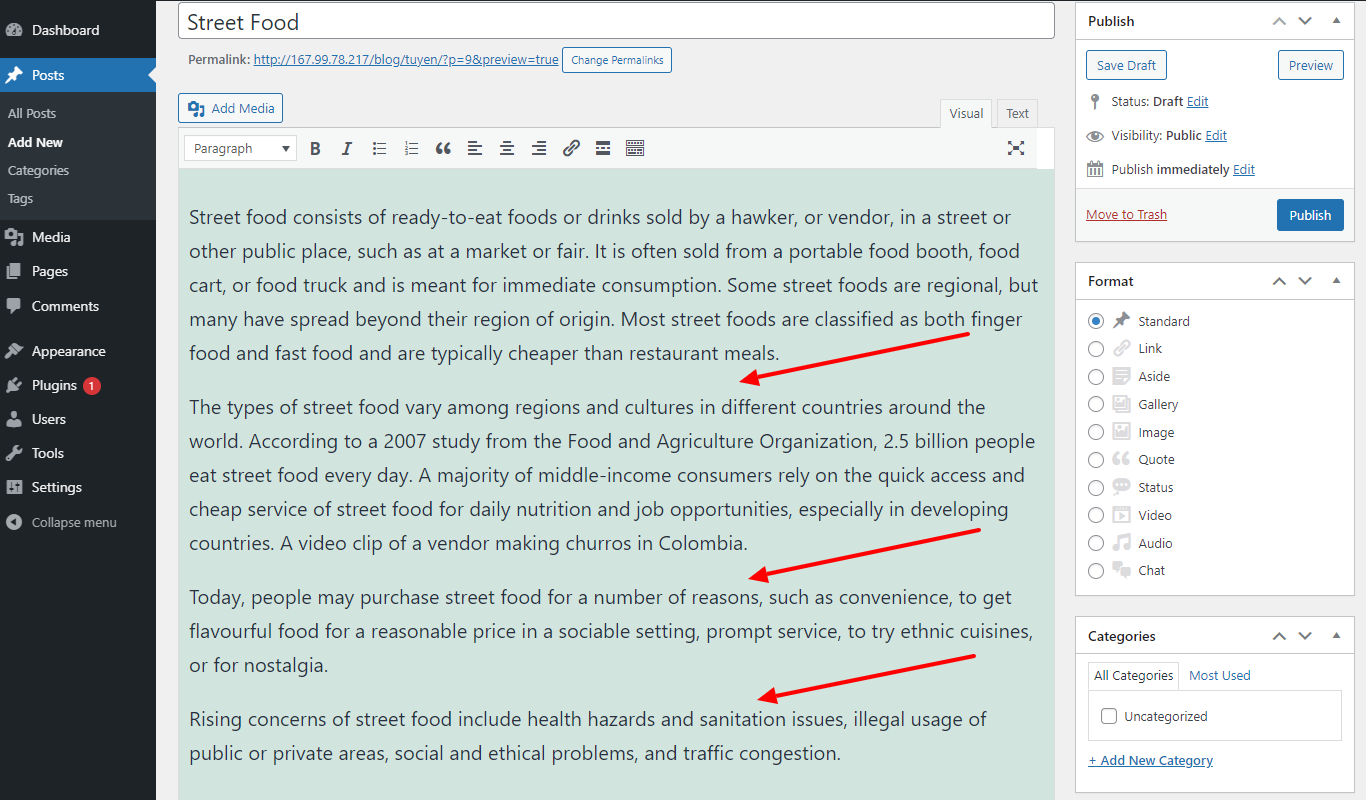
Now, when you return to visual text, each paragraph has a line break. As a result, the entire text has a clearer layout and is easier to read which you can see in the image below. Don’t forget to save your change with the ‘publish‘ or ‘update‘ button in the publish part.
You can utilize this way for Elementor. However, with Gutenberg, you can start a new line by placing the cursor anywhere you want to separate into a new paragraph in the text and pressing the key combination Shift + Enter.
Using code to add a line break
One more simple and easy method for you to insert a line break into your post text is using the code:
<br />
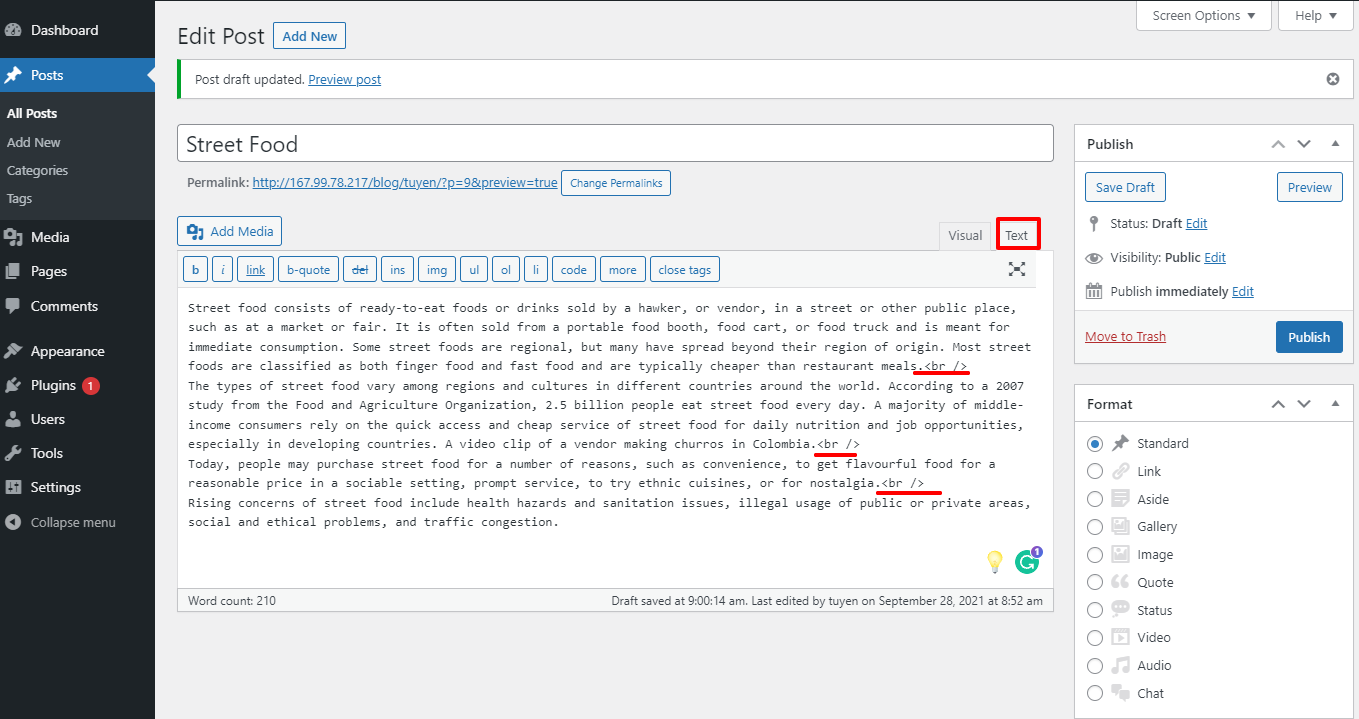
If the first way doesn’t work, you can move to this way by choosing the ‘text’ editor. Then, you just need to add the code we provide you above at the end of a line you want to have a line break. Now, you will have a text with many paragraphs and line breaks between them. It sounds easy, right?
Don’t forget to save all your changes to ensure your settings are not lost.
Changing line or paragraph spacing with CSS
If you are seeking a great solution to create a line break or change the spacing between lines, you need to use CSS.
On the admin dashboard, go to Appearance -> Customize, the screen will be the same as the image below. In the next step, let’s choose the Additional CSS option at the end of the left corner.
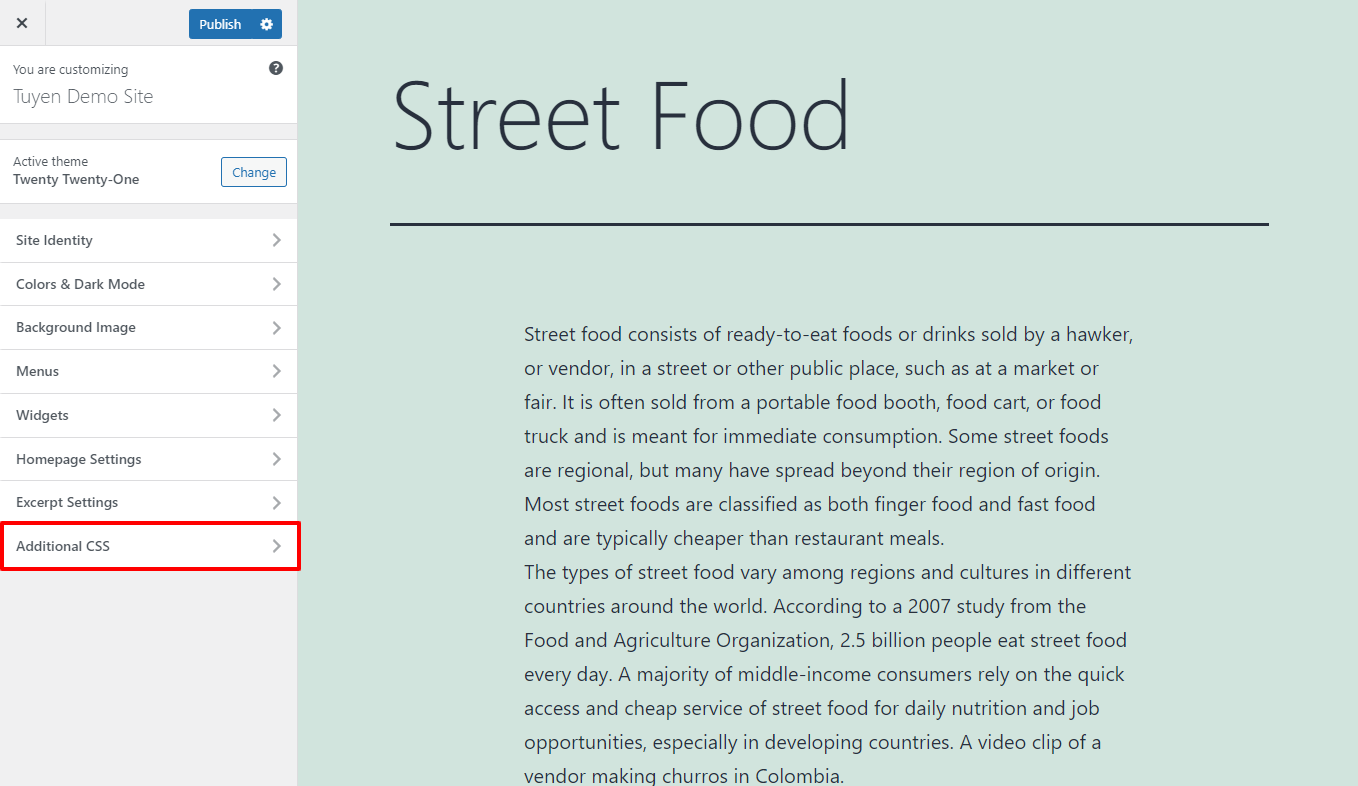
With an aim of generating the spacing between lines that you want, you just need to add the following code:
p{line-height: Xem;}
In the code, X is the number of ’em’. You can alter the X number into the one you want. In our example, we select the number 4. Thus, the spacing between lines is 4 ems.
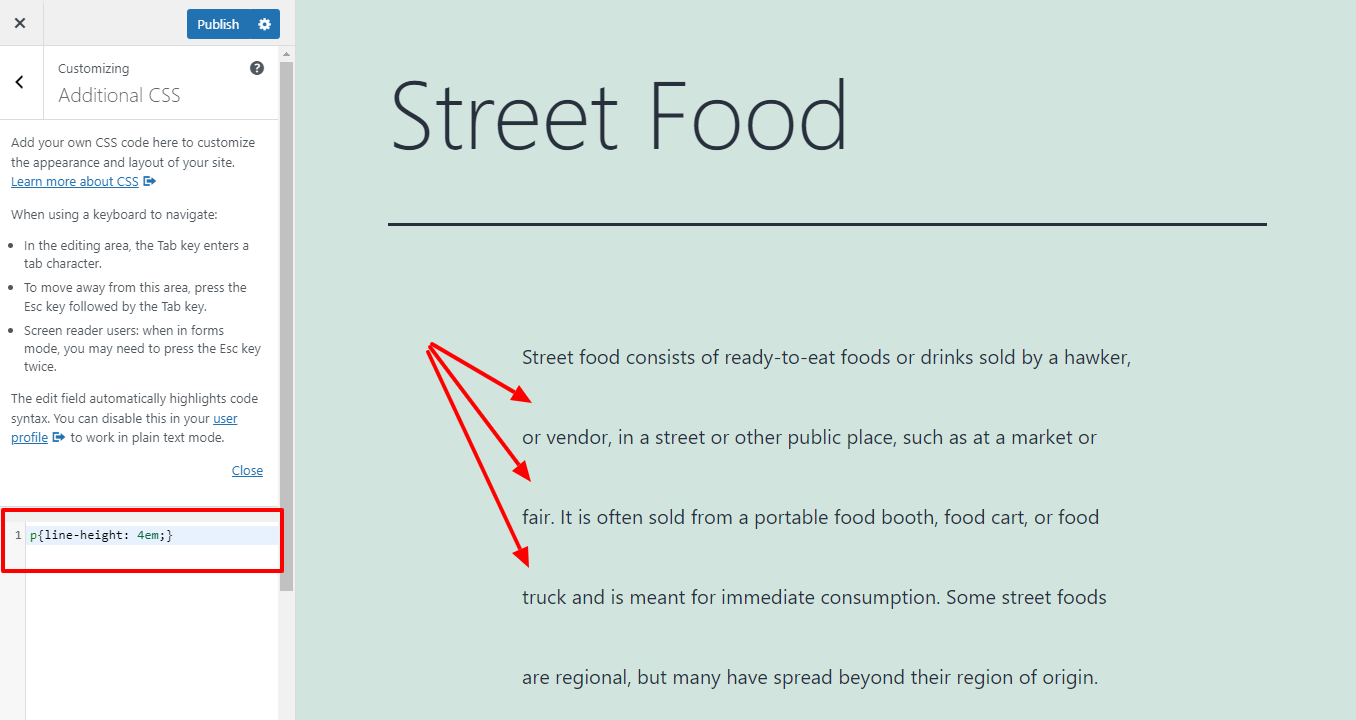
Furthermore, you can alter the paragraph spacing with the following code:
p {padding-bottom: Yem;}
Y is the number of ems you want to change.
You are able to utilize one or both of the codes for your text posts. Last but not least, ìn case you wish to use pixel instead of em, let’s change ‘em‘ into ‘px‘ in your code.
Closing thoughts
To sum up, there are many simple and effective ways for you to tweak the spacing between lines or paragraphs. We hope that the blog today will be powerful assistance for you. If you have any question, don’t hesitate to leave your comments. Moreover, if you are finding a new theme for your WordPress website, let’s visit our Free WordPress Themes here.
