A header should be one of the most crucial elements of every website. Typically, a header contains a menu that enables visitors to access your website’s most crucial pages fast. Another element that is frequently seen on a website header is the logo. If you don’t know how to write, Elementor enables you to create a unique header without writing a single line of code.
In this article, we’ll demonstrate how to create a Custom Header with Elementor.
What Elementor for WordPress is?
The best drag-and-drop WordPress editor, Elementor, is free and enables you to quickly and effortlessly create stunning WordPress websites. For straightforward blog posts, the built-in WordPress editor is acceptable, but it lacks design tools and does not let you test your design until you click the preview button.
This issue is resolved by Elementor, which offers complete drag-and-drop design freedom with a live, visual builder without the requirement for knowledge of CSS or HTML. You can view a design exactly as your visitors will, making it simple to make adjustments as necessary, while you’re designing it. Elementor offers a wide range of design options and dozens of pre-built content widgets for anything from buttons to forms, sliders, price tables, and more.
Moreover, in addition to creating individual articles and pages, you can utilize Elementor to construct your entire WordPress theme, including your header, footer, and everything in between.
What is the way to create a Custom Header with Elementor?
Utilizing the Elementor Header & Footer Builder plugin is strongly advised to create a Custom Header with Elementor. By enabling you to rapidly create such sections using the page builder without purchasing the PRO version, it improves the usefulness of the FREE edition. Additionally, this tool is a powerful Elementor Search plugin with a range of design and aesthetic options.
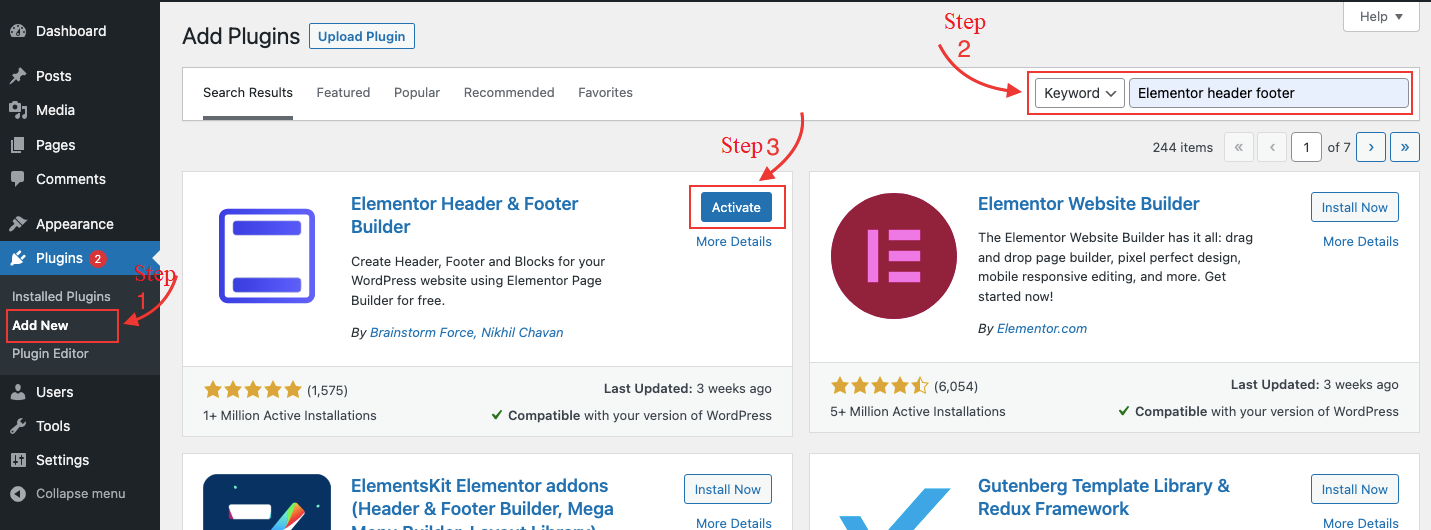
Step 1: Install and activate the Elementor Header & Footer Builder plugin first.
To utilize this plugin, just stick to these steps:
- Click Add new after selecting Plugins from the dashboard menu.
- Install the tool’s files by finding them.
- Once activated, go back to the website management panel.
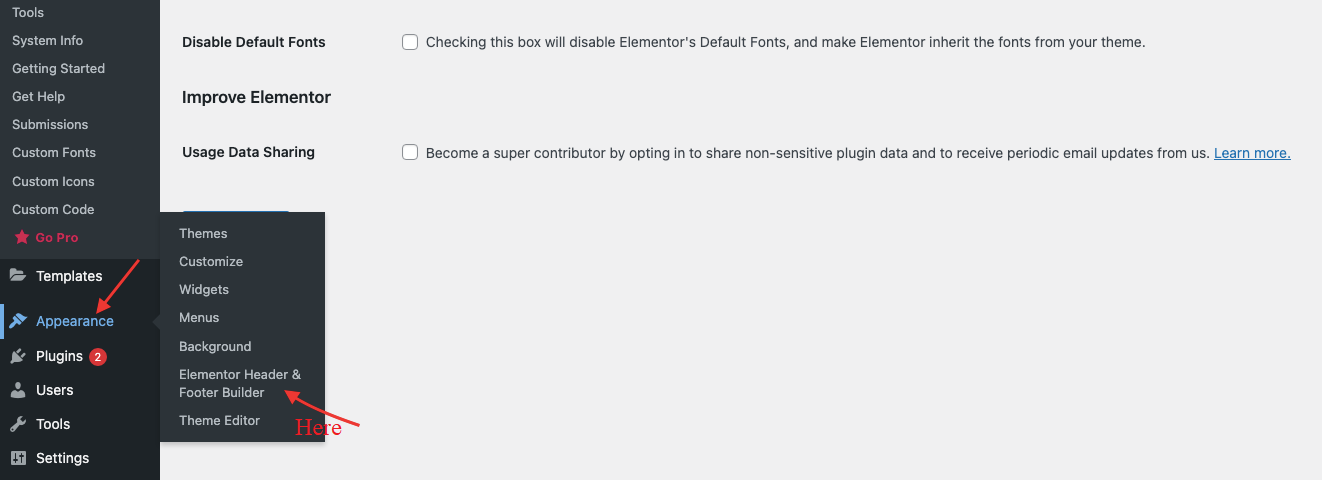
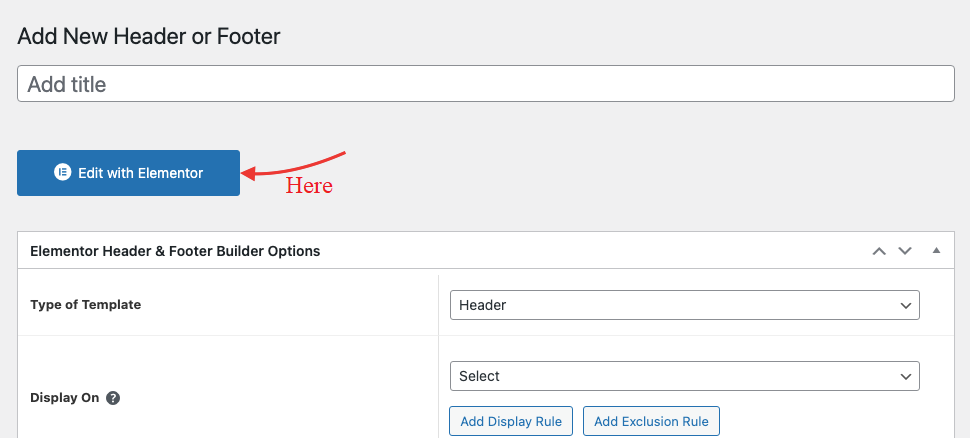
Step 2: Look for a new selection called “Elementor Header Footer Builder” under Appearance. Continue to click it.
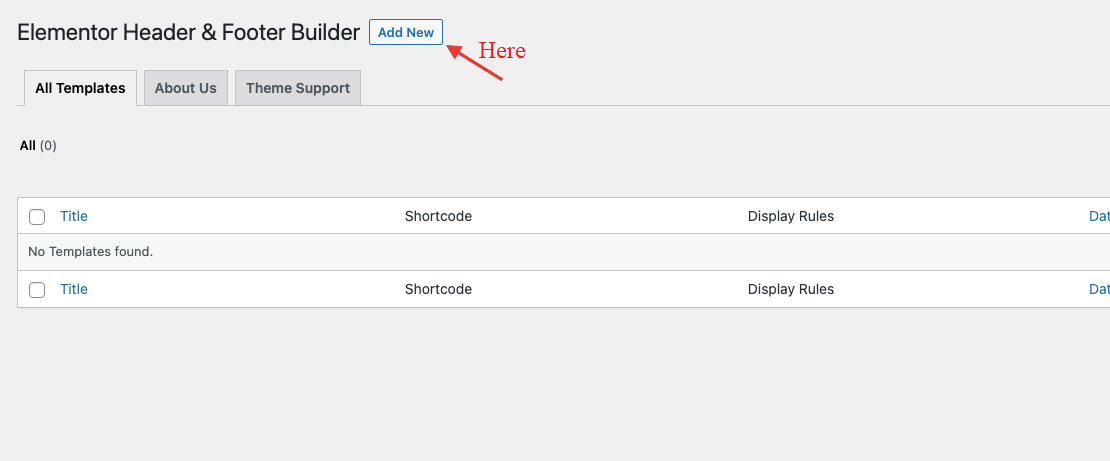
To create a new block, select “Add new”
Step 3: Starting with the footer From the “Type of Template” drop-down box, select Footer.
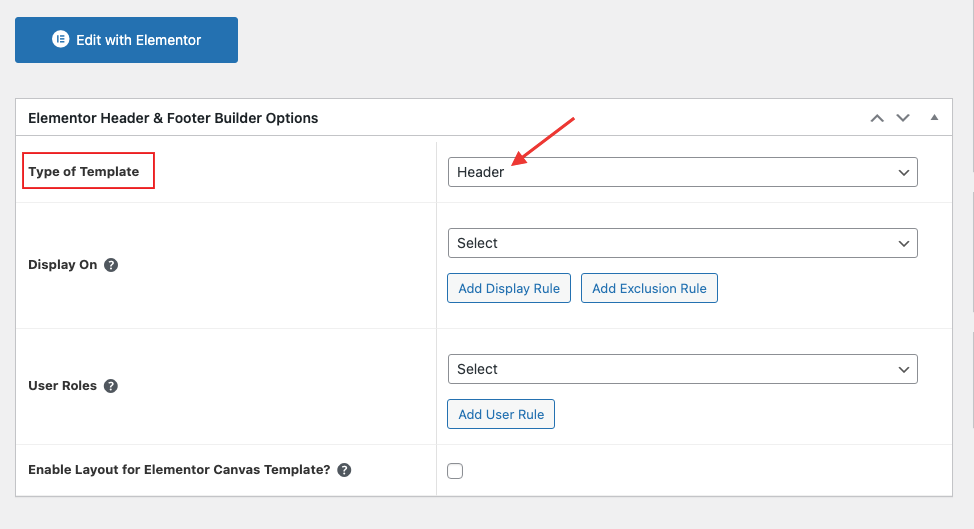
This will display a panel that resembles a typical page. Find the “Edit with Elementor” button and click it.
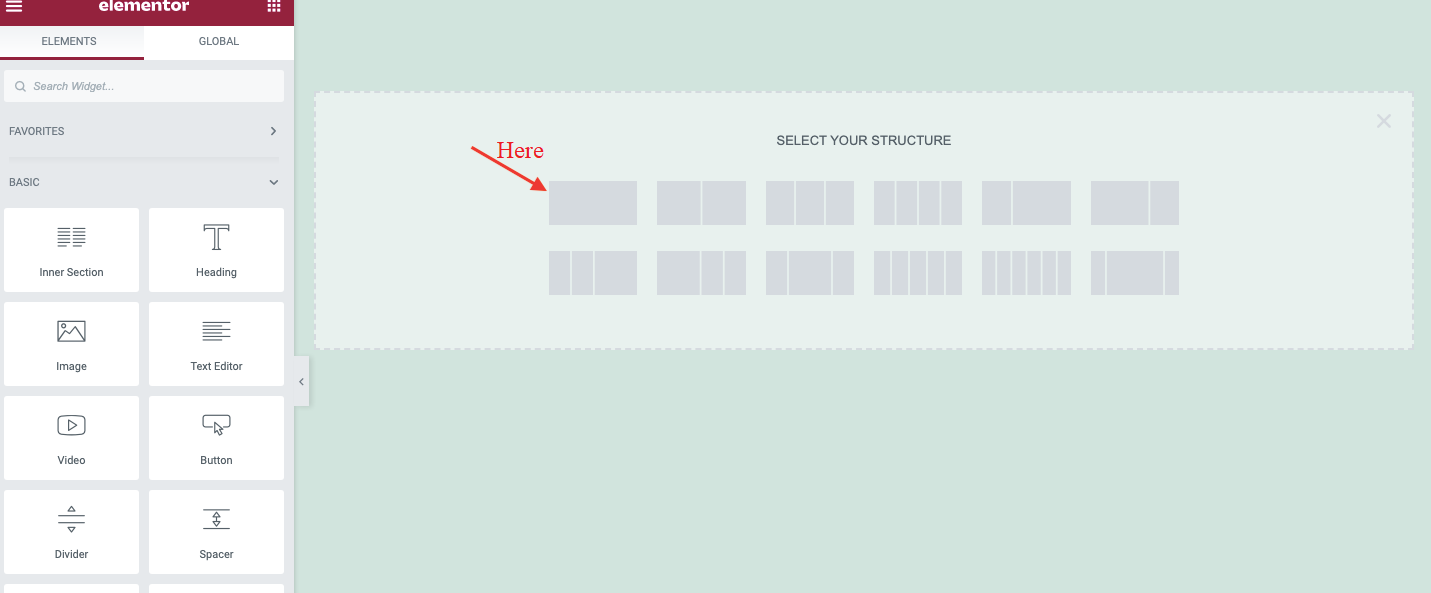
Step 4: From the first block in the visual editor of Elementor, choose “Structure“
Select the Single Column option after creating a new section.
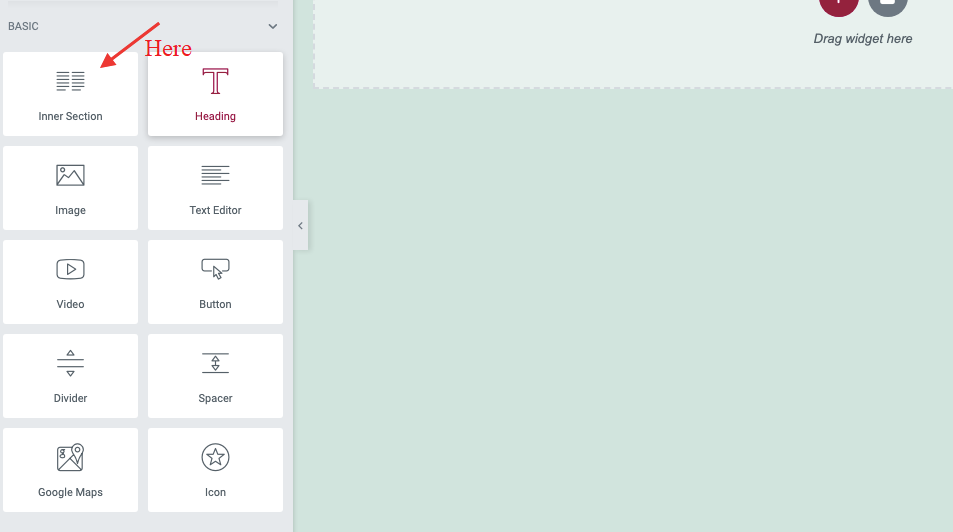
Step 5: After adding an Inner Section, right-click the section and add another column.
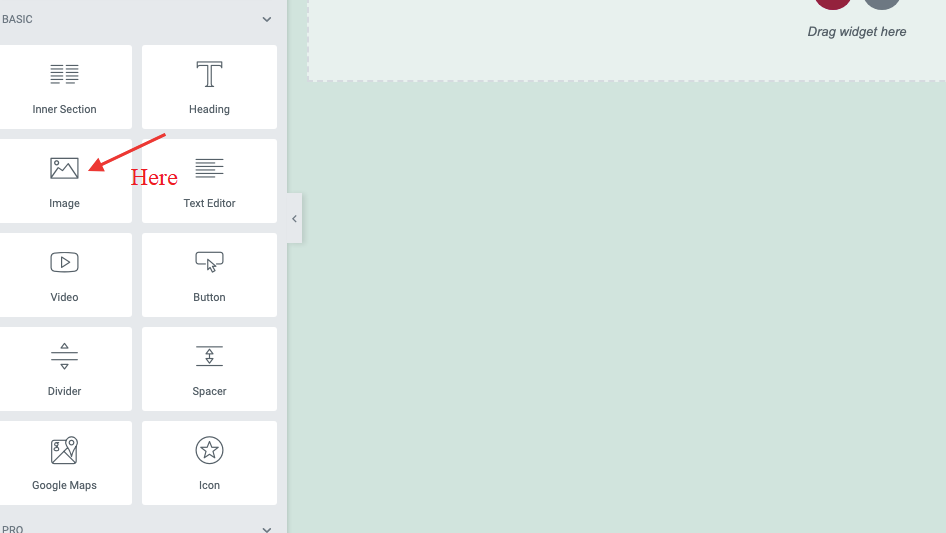
Step 6: The Widgets section’s first section should have an image.
The image of your logo should be placed here. Drag an image widget into a section to add it there.
Step 7: The Navigation Menu widget should then be moved to the second column to add the Menu.
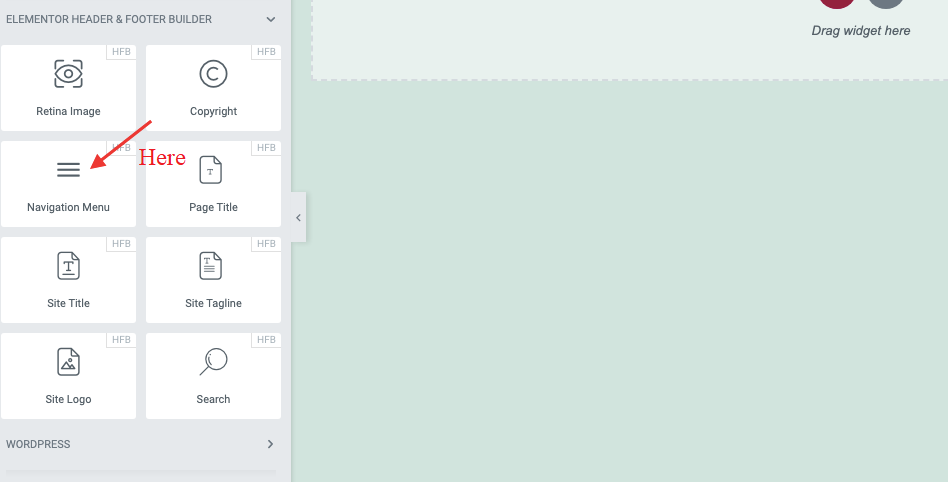
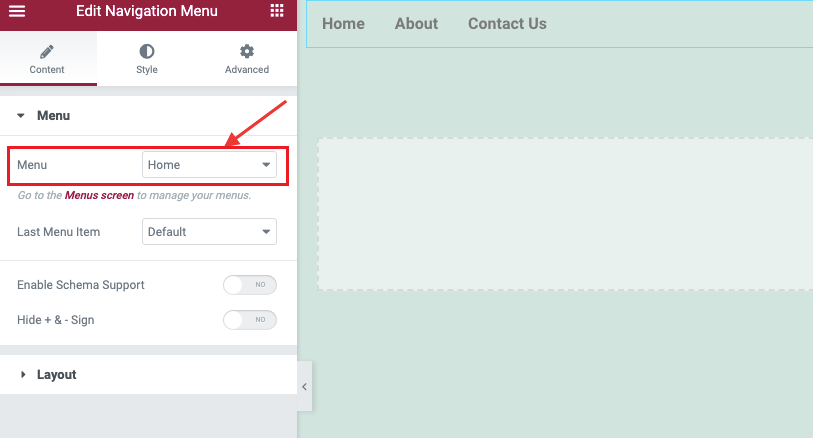
By choosing the Navigation Menu you added in the second column, choose the menu you desire. The menu will be built at the customizer.
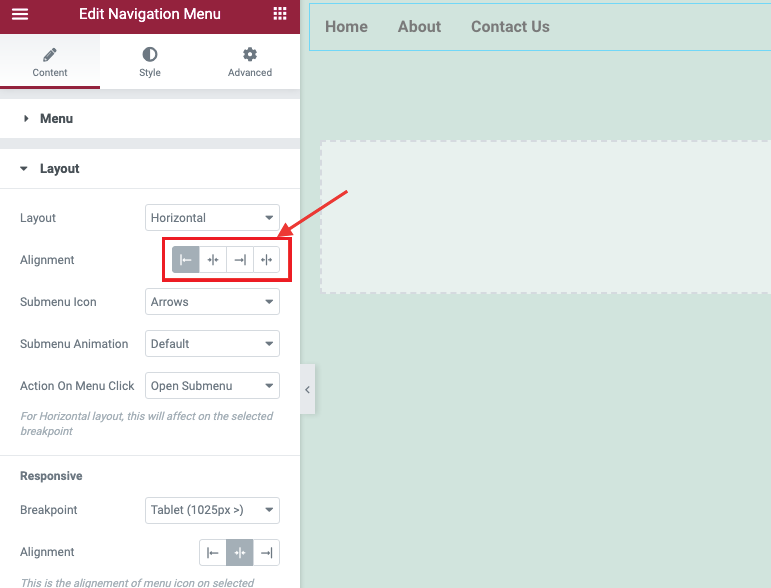
Then choose centered Alignment from the sidebar (the second one).
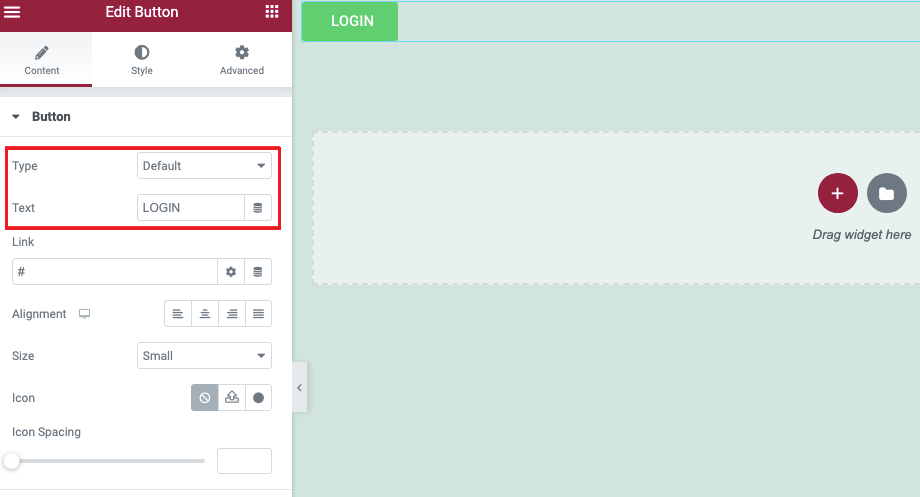
Step 8: Insert a button in the final column.
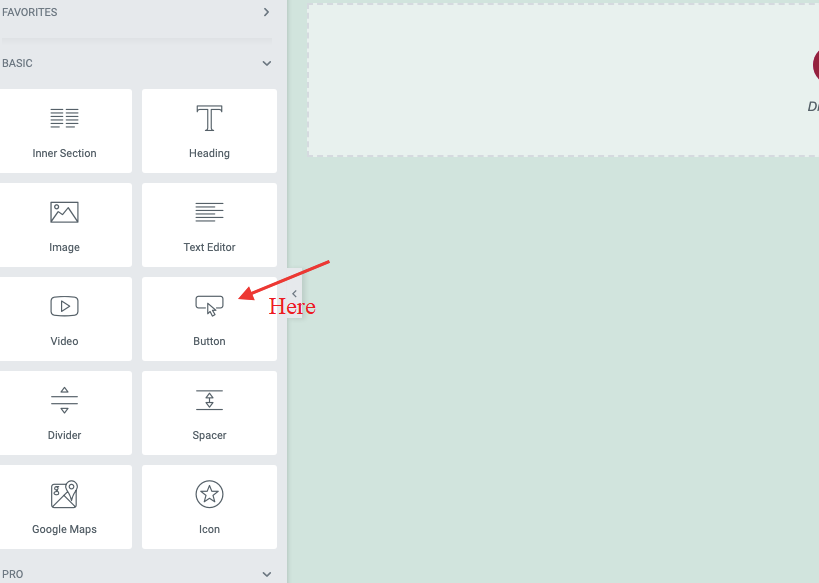
“LOGIN” should be the button’s text, and the right alignment should be used.
The Header is now finished!
To sum up
You may create a Custom Header with Elementor without paying for the premium edition. Elementor Pro is required if you wish to develop a more intricate and dynamic website. Please share your thoughts in the comments section. For more information on eye-catching themes and styles for your Elementor news and magazine sites, see Free WordPress Themes.

