Do you already know how to add keywords and meta descriptions in WordPress? If not, keep reading this comprehensive instruction below. First and foremost, we’ll give you some facts you’ll need to learn more about this subject.
The definition of a keyword and meta description in WordPress
- In SEO, a keyword is understood as a main word or phrase that aids in describing the content of a blog post or website. People use short or long keywords while searching for something on Google or other search engines.
- A meta description is a meta description element that is significant because it provides a 155–160 character overview of a web page’s content. This is the response to the frequently asked question, “What is a meta description? ” While the meta description contains the terms the user is searching for, search engines will highlight it in the results.
The benefits when you add keywords and meta descriptions in WordPress
Really, the two most important factors in raising your website’s ranking are keywords and meta descriptions. They will assist you in informing search engines of a brief overview of the information contained in your articles or pages
Additionally, when your keywords and meta descriptions appear in Google search results, you gain a lot of advantages:
- Increase the click-through rate since the SERPs’ summary of a web page.
- Help your website rank higher more quickly by increasing the click-through rate over time.
- Because it appears as a webpage on the SERPs, make your website more user-friendly.
- Assist users in selecting the best appropriate web page from a large number of search results rapidly.
- Increase the number of leads on your website as a result of more visitors.
How to add keywords and meta descriptions on WordPress?
On the internet, there are a ton of helpful resources that can be found. To optimize your material, they can enable you to add keywords and meta descriptions. However, in today’s post, we’ll use Yoast SEO to reduce your issue. due to the fact that it is one of the best plugins for improving your website’s rating on search engines. It is also quite simple to set up and operate. Now let’s get going.
Solution: using Yoast SEO
Yoast SEO is acknowledged as one of the most effective WordPress SEO plugins that may help you rank better results in search engines, with over 5 million active installations. This plugin provides a wide range of innovative and practical features, including detailed Schema.org integration, title and meta description templating, and much more.
Additionally, it smoothly connects with a variety of themes and plugins, such as Zapier, Algolia, etc. The free version and the pro version of this plugin are both available. In the blog post today, we’ll provide a free version sample.
Stage 1: Installing and activating Yoast SEO
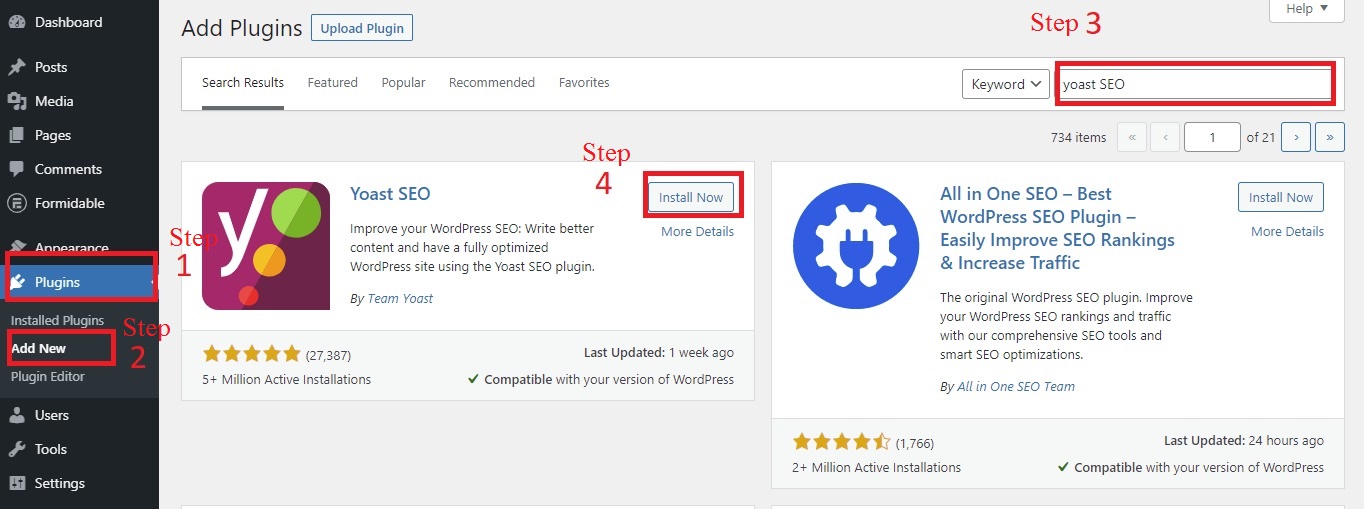
If Yoast SEO has previously been installed. Let’s navigate to Plugins> Add New on your dashboard and enter the plugin’s name into the search field. The screenshot image shows the Yoast SEO plugin. Install and activate it immediately.
Stage 2: Configuring Yoast SEO
To begin, select the SEO area from your WordPress sidebar. You’ll then be directed to your Yoast dashboard. To configure settings, select Configuration wizard.
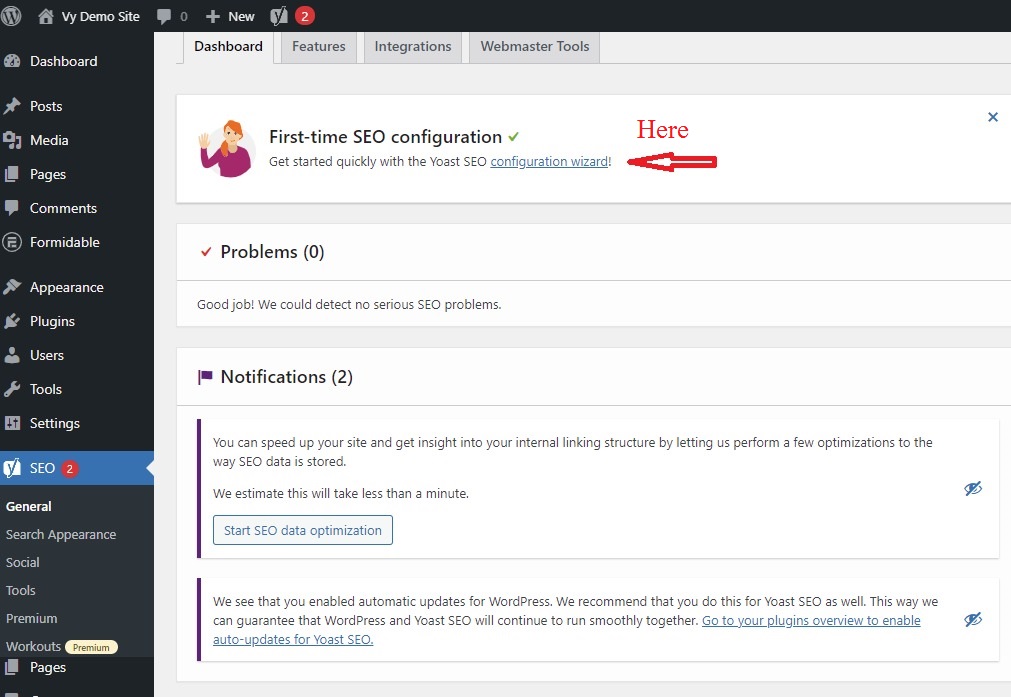
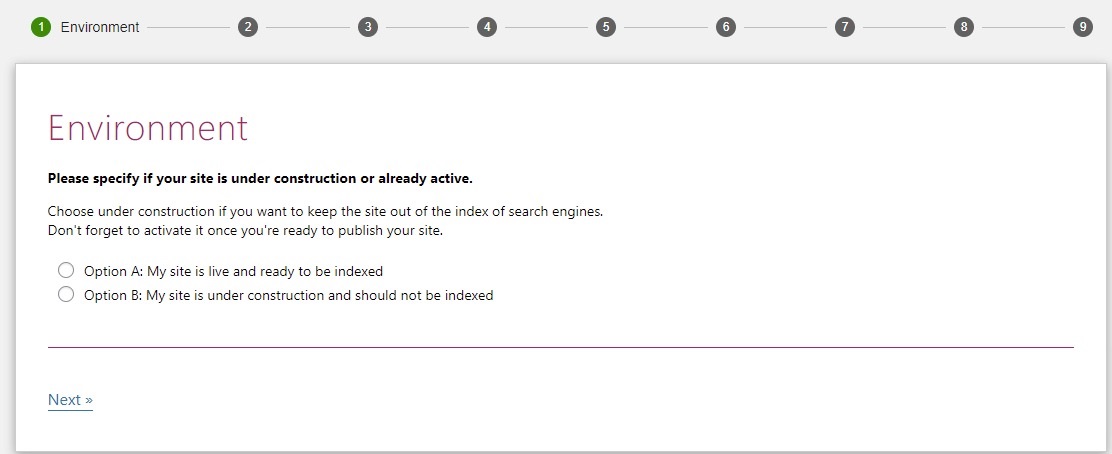
Yoast SEO offers 9 steps to complete configuration settings here. The environment is the first thing to consider. What kind of website do you have? Yoast SEO wants to know.
Whether you choose under development and should not be indexed, Yoast SEO will stop search engines from indexing your site, which can lead to many problems including duplicate content.
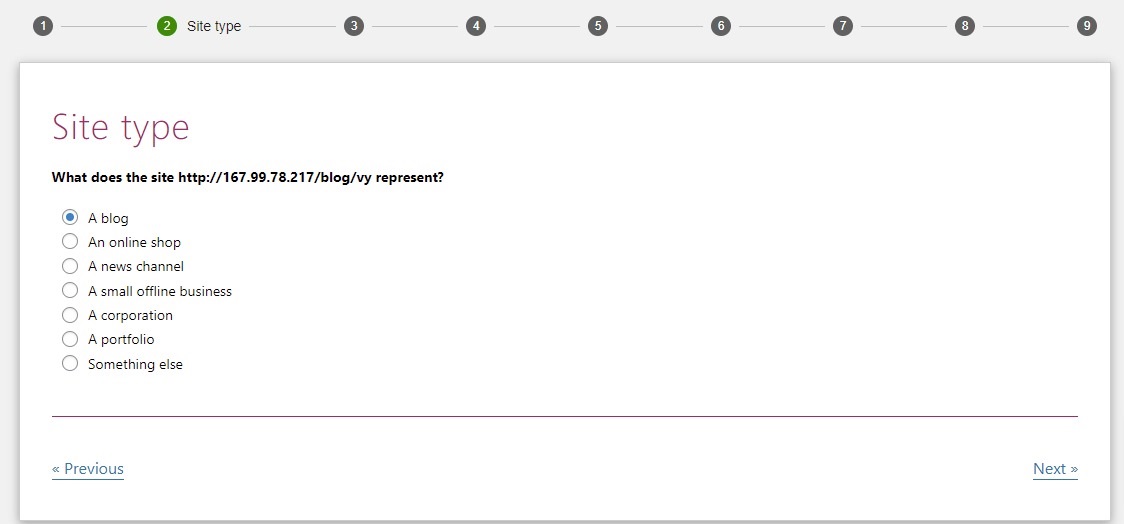
The type of your website will rely on the one you currently have, so that is the next step. We will choose the “a blog” option as we are building a personal blog in this instance.
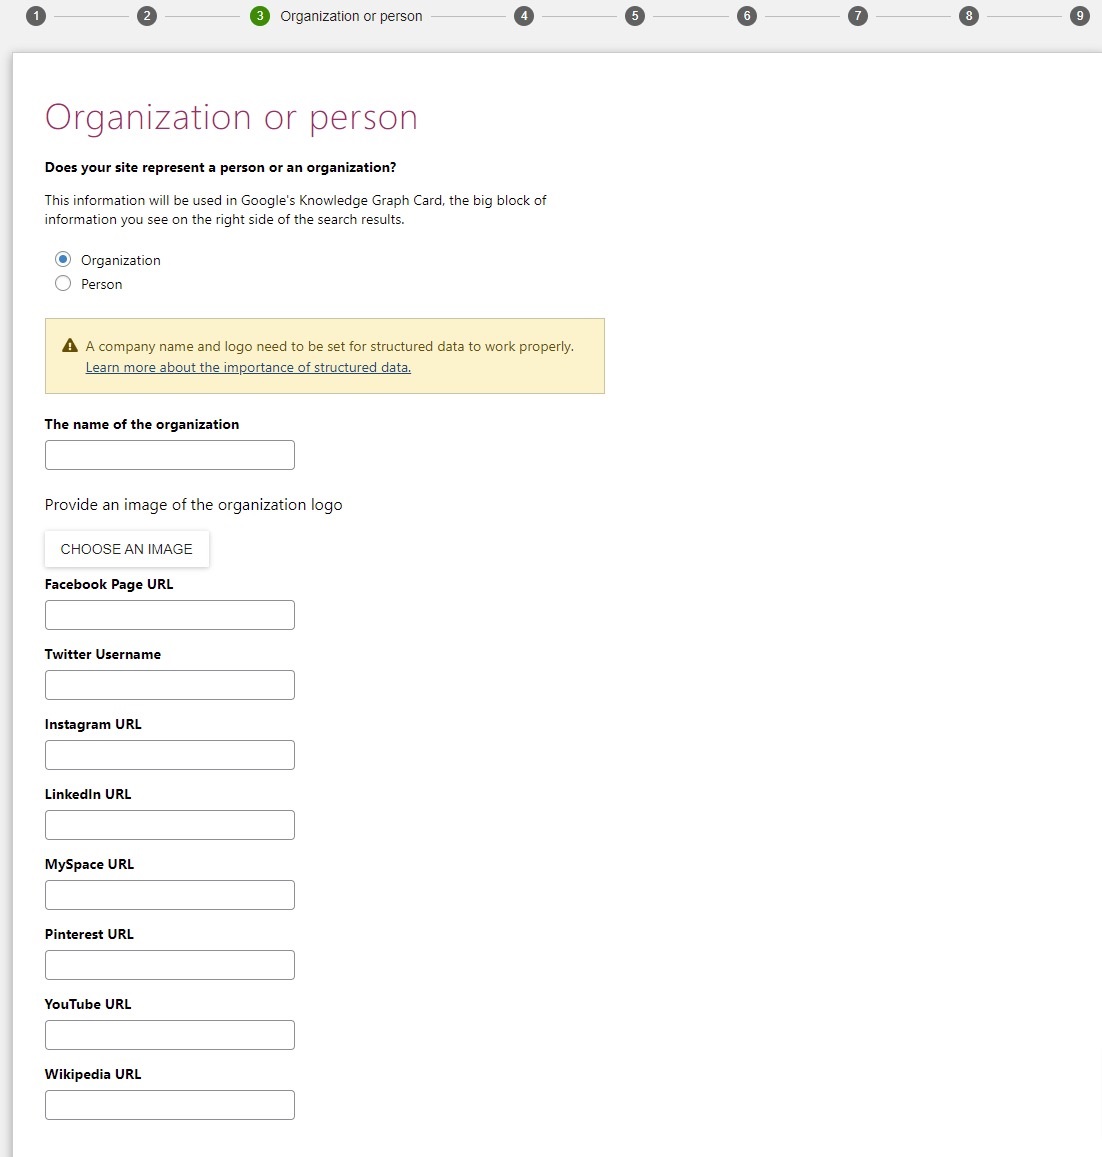
Yoast asks whether you are a person or an organization in this section. If your website is for a business, you ought to select the organization option. After that, there are other fields to fill out, including the organization’s name, its logo, and links to its social media accounts.
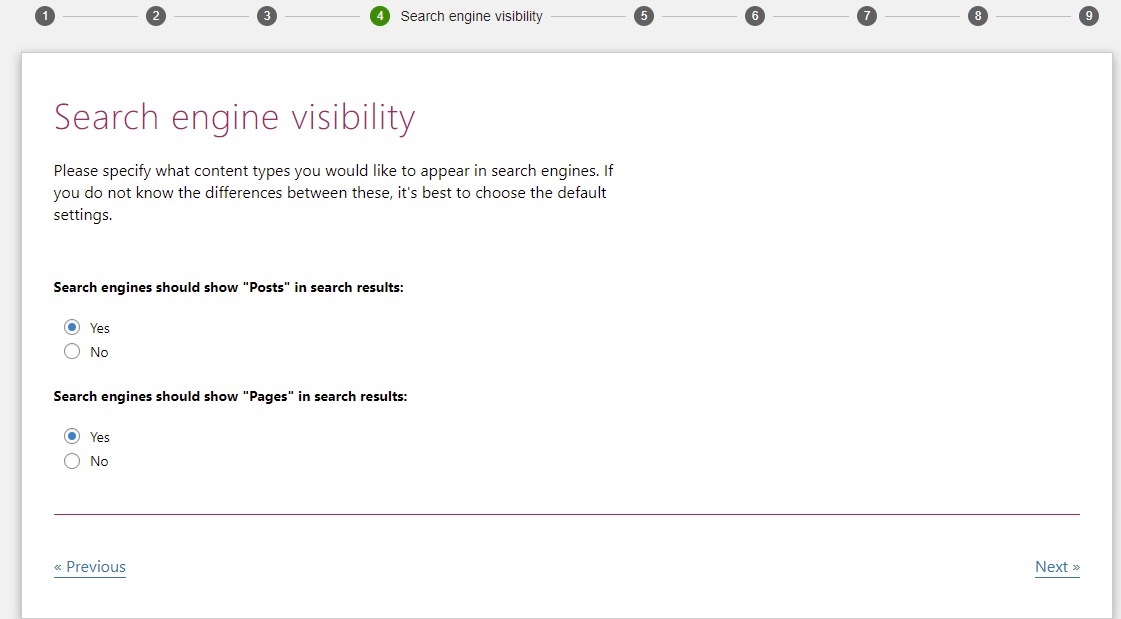
Next, you can decide what kind of content you want to make available to search engines. what pages or what information it should display in search results. We advise ignoring this query and maintaining the default options.
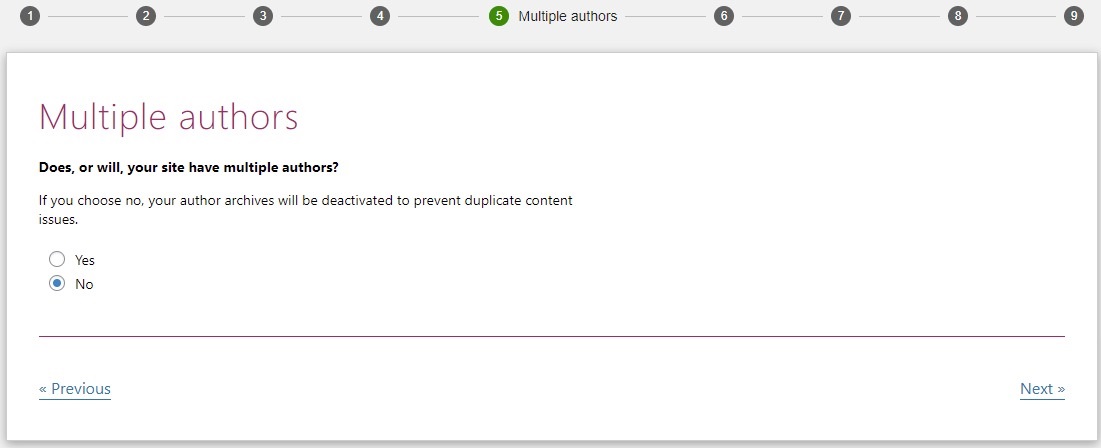
Another query is whether there are multiple authors on your website. Depending on how many authors are on your site, this query. You would select “No” if all authors who publish on your website under the same user name are one author.
Title settings are the next step. Your website’s name must be entered. The next step is to select a symbol to serve as a title separator. After your SEO title, this symbol will show up in the search results.
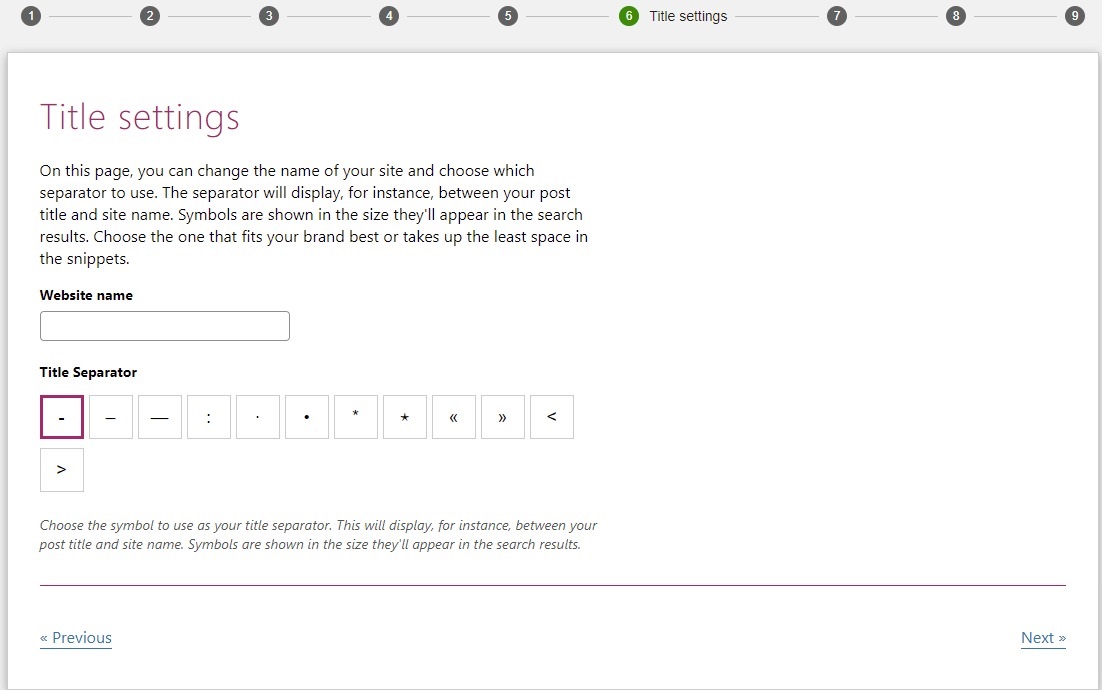
For instance, if we select a straightforward dash, this is how it appears.

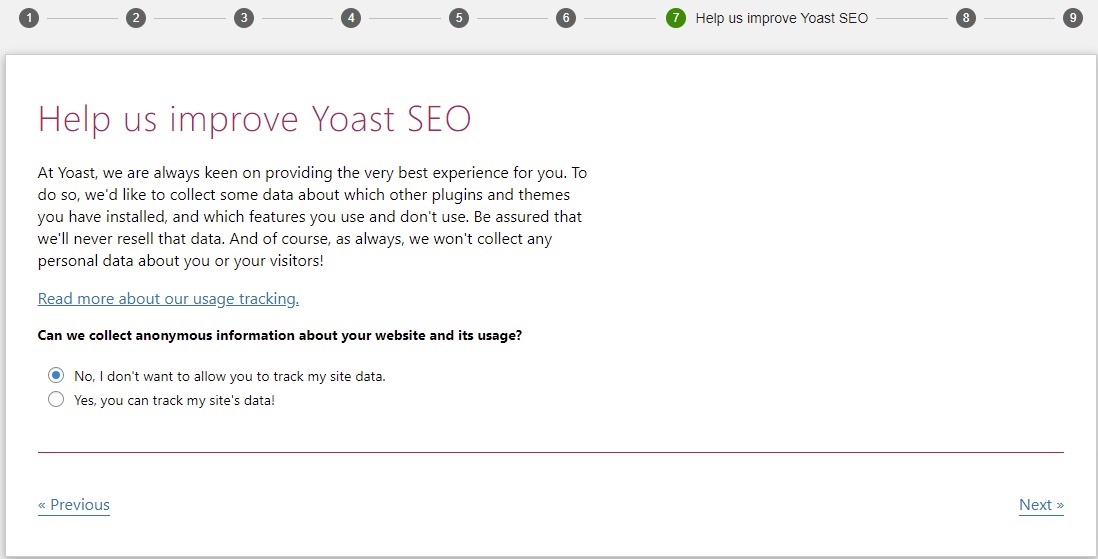
Following that, Yoast SEO will inquire if they can gather some anonymous data regarding other plugins and themes on your website. To secure your site, you should select “No” for the settings if you don’t want this program to monitor your data site.
You may subscribe to Yoast’s newsletter with Yoast SEO. If you are a novice, we advise signing up so that you can keep learning. If you prefer to learn on your own, you can skip this section.
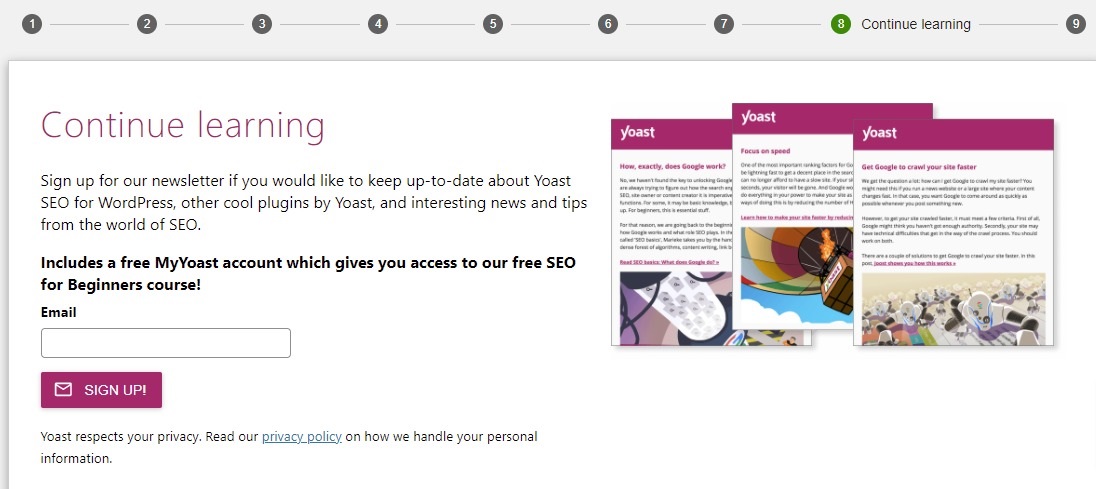
You have just concluded the configuring procedure after completing this step. Let’s now add keywords and meta descriptions in WordPress.
Stage 3: Add keywords and meta descriptions for your posts/pages
You must first create a new article in WordPress in order to add keywords and meta descriptions. The Yoast SEO box will then appear when you scroll to the bottom of your post.
You must complete both of the fields in this box. You must enter a brief key phrase in the first spot to assist the SEO analysis tool in evaluating your content with the proper keyphrase in mind.
Let’s add a meta description in the second spot that is between 120 and 160 characters long. A thoughtful but convincing summary of your post’s content constitutes an effective meta description. Instead of judiciously including keywords in the description, you should avoid just listing them. Additionally, you want to employ some compelling language to encourage visitors to click on your post and read more.
Following that, your meta description will appear in search engine results below the title and URL, as shown in the third space below.
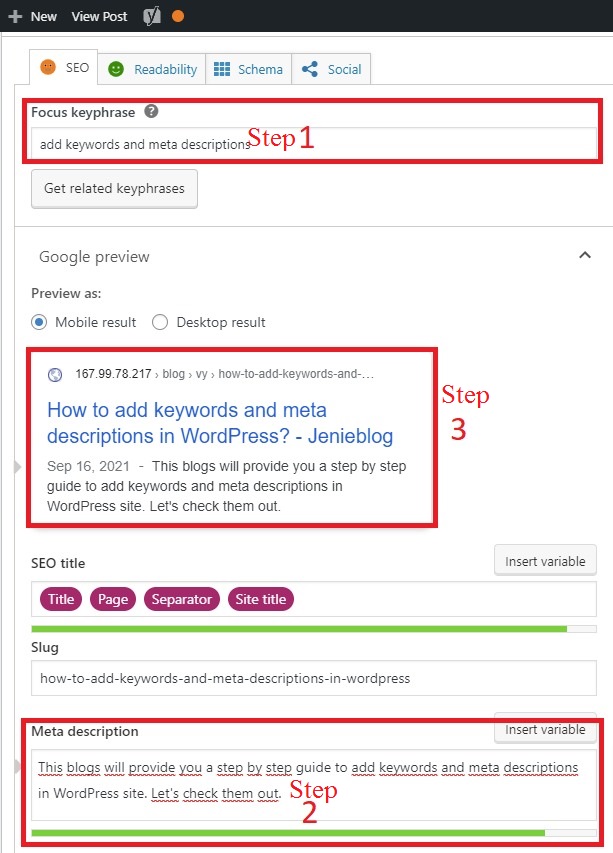
It’s time to examine its SEO friendliness next. You must check to see if you have yet to set the focus keyphrase. You may assess how well your content is optimized to rank for a certain keyword phrase with the aid of SEO analysis.
Click on the SEO analysis area, which is located below the meta description box, as you scroll down. Here, it will highlight various errors and corrections that you need to make in order to optimize your content with red and orange bullets.
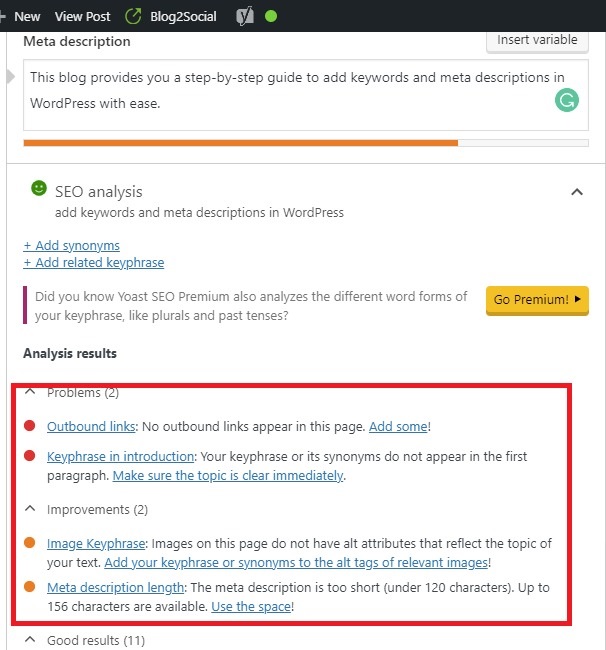
On the other side, if you have your material completely optimized. The green bullets will highlight the important topics. All green bullets, however, are not a guarantee that your post will appear higher in search engine rankings. Since a number of other things also have a role. This element will be discussed in the upcoming blogs.
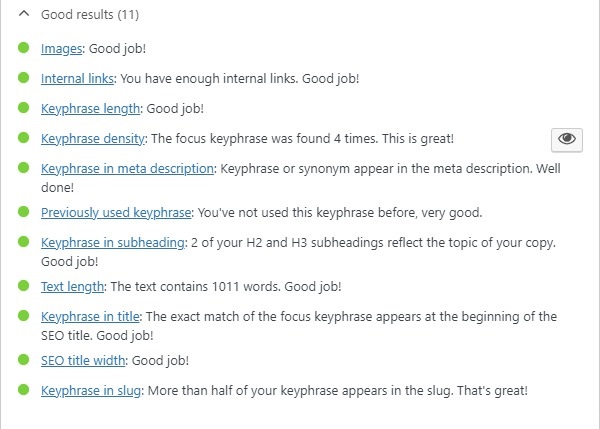
Stage 4: Add keywords and meta descriptions to your category and tag archive pages
On your dashboard, first, navigate to Posts> Categories/Tags, and then select the “Edit” tab.
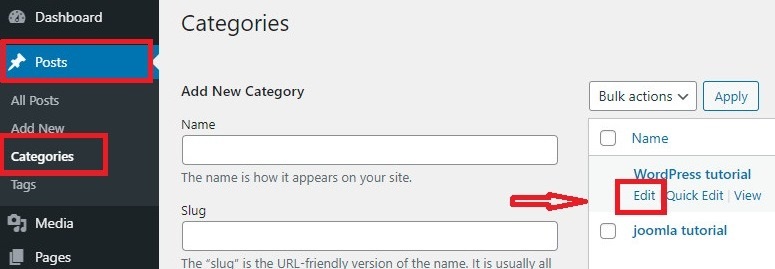
Next, simply enter keywords and meta descriptions in the Yoast SEO box as you did in the preceding steps. Before continuing, don’t forget to save the modifications.
Summary
We’ve just given you a step-by-step tutorial to make it simple for you to add keywords and meta descriptions. Hopefully, the information in this blog will help you raise your website’s position in Google search results. Please don’t be shy about mentioning any questions or issues you have with this plugin in the comments section below. If you want to look at additional choices that also let you add keywords and meta descriptions, have a look at WordPress SEO Plugin as an alternative.
Additionally, don’t overlook the numerous stunning, contemporary, and responsive themes and templates available at our free WordPress themes. You can visit and look at a variety of helpful site design options.
