Introduction
It’s simple to add a profile picture of the author in WordPress to their profile if you run a WordPress website. As you are aware, it is imperative to display the author’s profile on a website that offers information in the form of blogs or articles. It improves the correctness of the material provided in the article and promotes the author’s writing. The author’s name, bio, contact information, and profile image are all included in each basic profile.
Nonetheless, the blog today is for you if you’d want to utilize the author’s genuine photo instead of gravatar. So, let’s examine how to add a profile picture of the author in WordPress.
How to add a profile picture of the author in WordPress?
Indeed, you can use WordPress Avatar Plugins to add an author profile picture, and in this blog, we’ll show you how to add a profile picture of the author in WordPress with the ProfilePress (Formerly WP User Avatar) plugin.
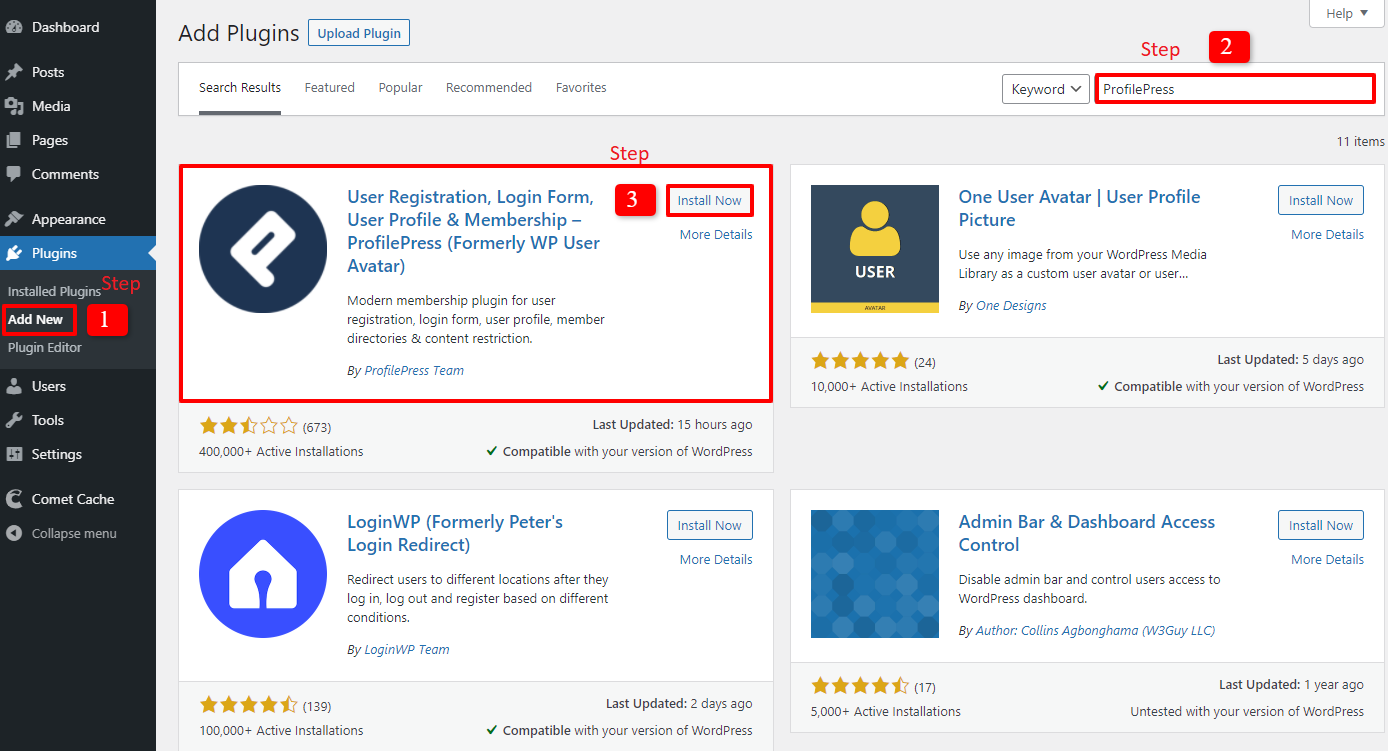
Installing and activating the ProfilePress (formerly WP User Avatar) plugin is the first step. Let’s click Plugin -> Add New and then enter “ProfilePress” in the search field. You are now able to “Install Now” and “Activate” the first plugin.
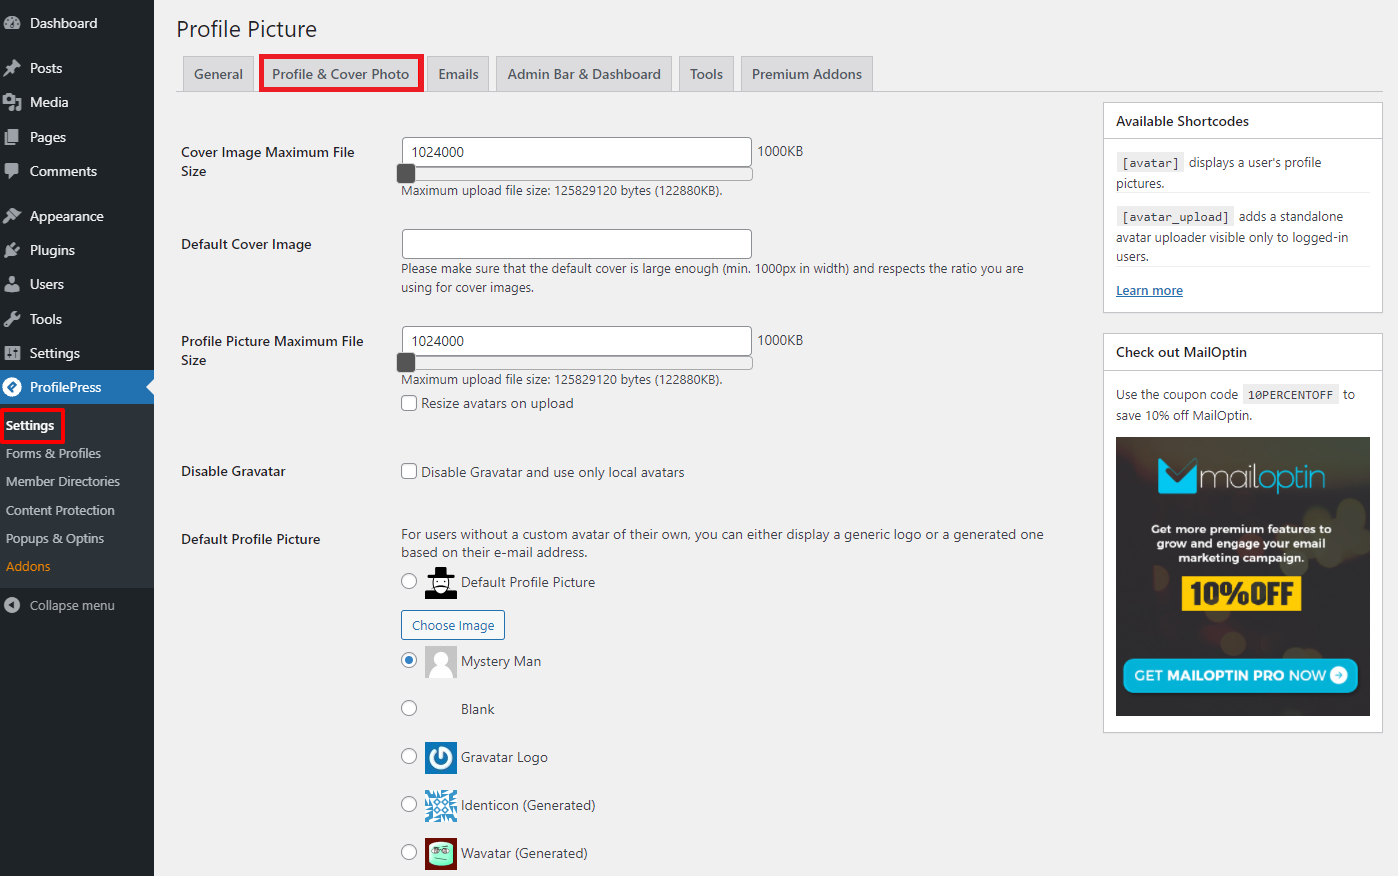
There will be a Label for ProfilePress on the admin dashboard. Choose it, then navigate to Settings. The following step requires you to click “Profile & Cover Picture” and modify all of your profile image settings.
With a single click in the box, Gravatar can be enabled or disabled. Also, if writers or other users don’t use their photos with the default profile picture option, you can change their profile picture.
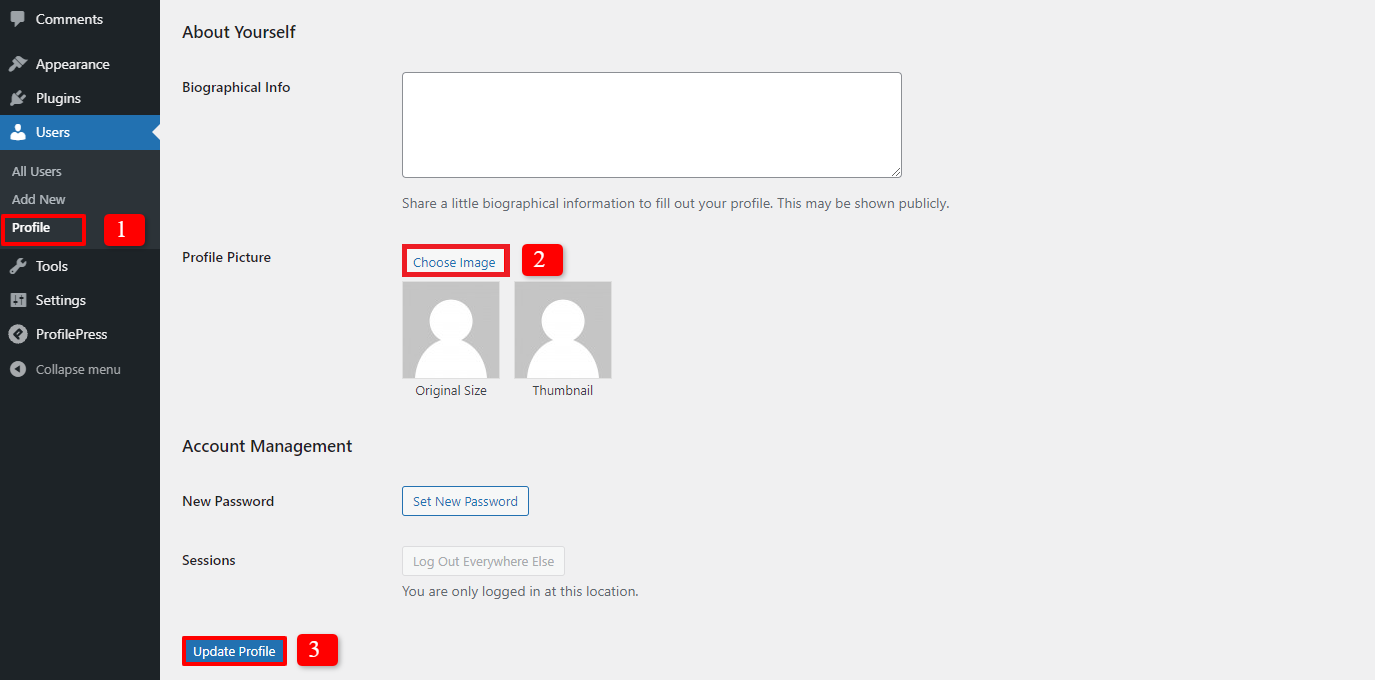
Click Users -> Profile right now, and then go down to the “About Yourself” section. You can choose photographs for both the original size and thumbnail in the section for the profile picture with ease. Do not forget to update your profile after adding your avatars.
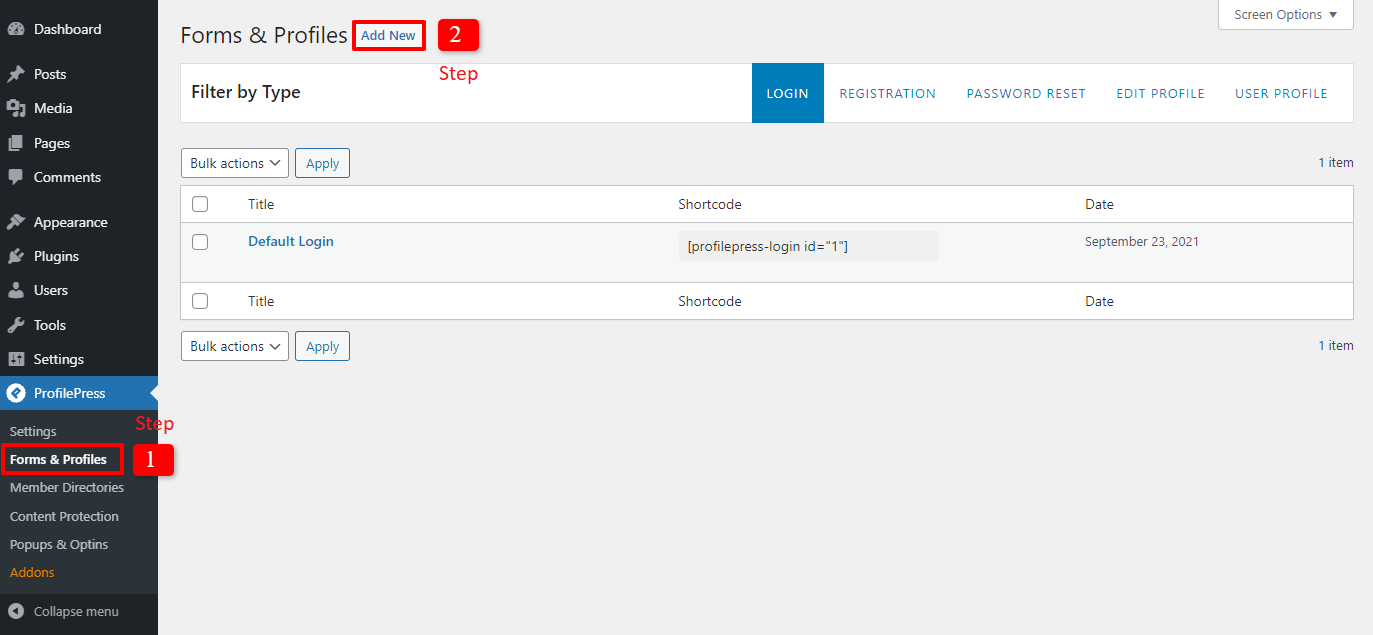
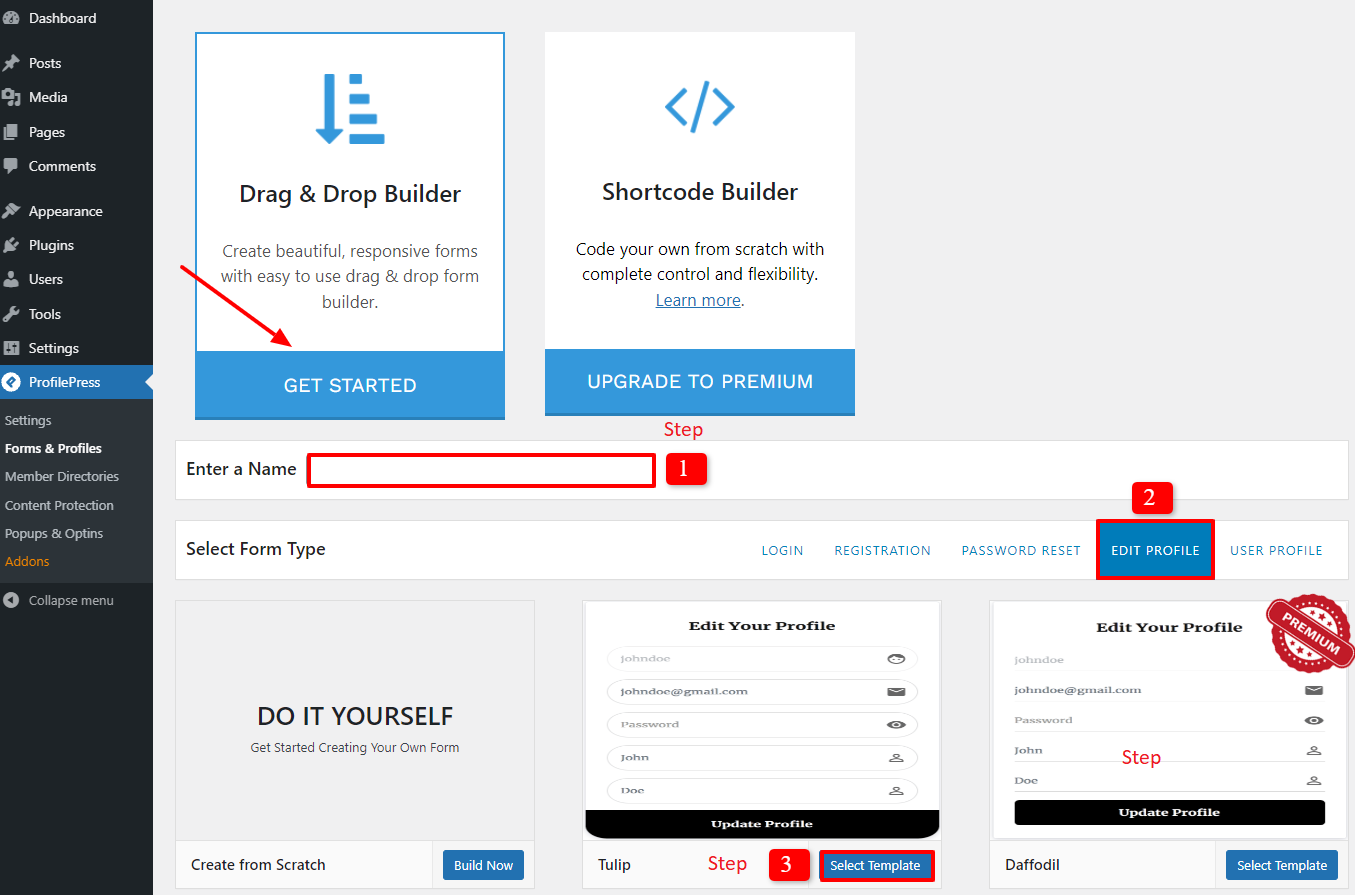
Go to ProfilePress -> Forms & Profiles -> Add New to allow writers or users with different responsibilities to change or add their profile images without login into the admin panel.
If you don’t know much about shortcodes, you can use a drag-and-drop builder to create an edit profile form.
The name of a new form, such as Edit Profile Page, Custom Edit Profile, and so forth, must then be filled out. After typing a form name, don’t forget to choose the form type. In this instance, we’ll select “Edit Profile.”
You will have three template choices to choose from. Feel free to click the “Create Now” option in the first box if you want to design a form of your own. Use the provided templates if you don’t need to create a form from scratch. Thus, in case your plugin isn’t updated, let’s select the Tulip template. On the other hand, you must upgrade your plugin if you wish to use the premium version.
We shall in this instance choose the Tulip template from the second box.
It’s time for you to customize a new form. Let’s click “Upload Profile Picture” in the Standard Fields session to add this field to your form.
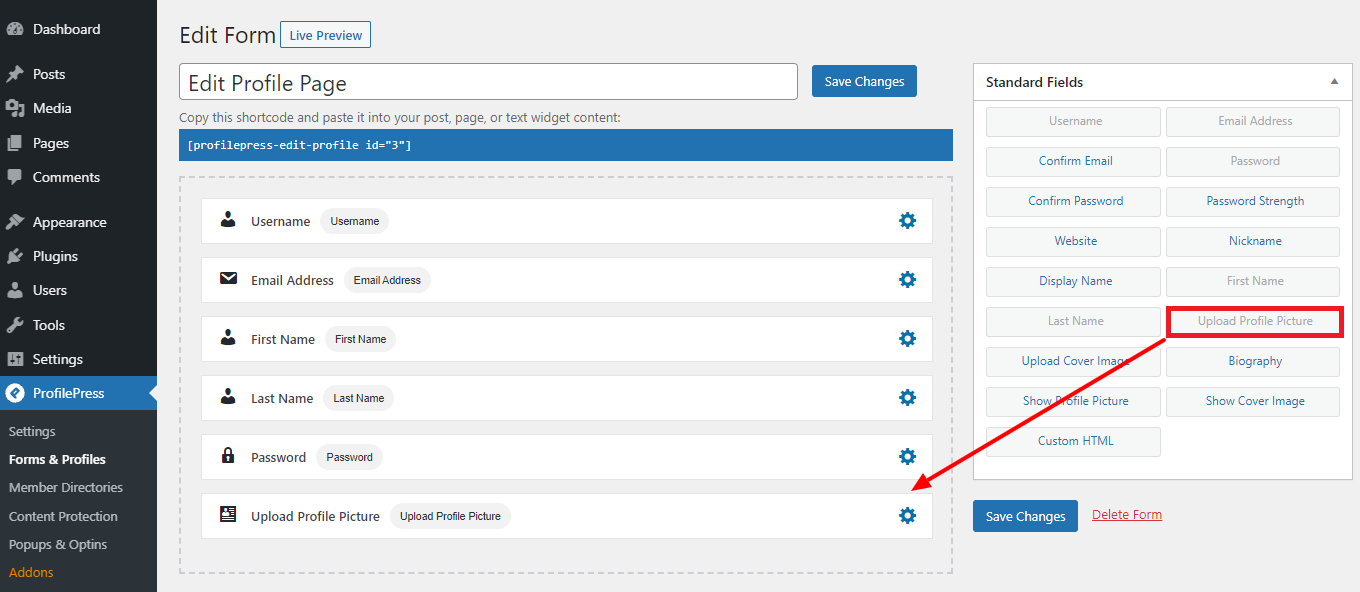
Also, there are other choices to adjust the form parameters when you scroll down. When all of your settings are complete, don’t forget to click “Save Changes.” Everything is finished now. As a result, both the authors and other users can easily alter their avatars or profile photo.
Conclusion
In a nutshell, we have already demonstrated how to add a profile picture of the author in WordPress efficiently. You may accomplish it without any hassle if you use the ProfilePress plugin. Thus, we hope that after using the tutorial, you will feel satisfied. Please leave a remark below if you have any questions. Furthermore, let’s take a look if you’re hunting for some practical Worpdress Author Box plugins.
By the way, we provide a huge selection of attractive, modern, and free WordPress themes that completely support this practical feature. Come on over and let’s ask one of them to redesign your website.
