What is Category?
Category is considered one of the pre-defined taxonomies in WordPress. It can be used to help you categorize or group a lot of blogs or articles that have something in common into various sections.
Why should you need to add categories in WordPress?
It is necessary for you to add categories in WordPress. Because it is the best way to help the readers easily find the content that they want to read on your website quickly. In addition, adding categories will make your website well-organized.
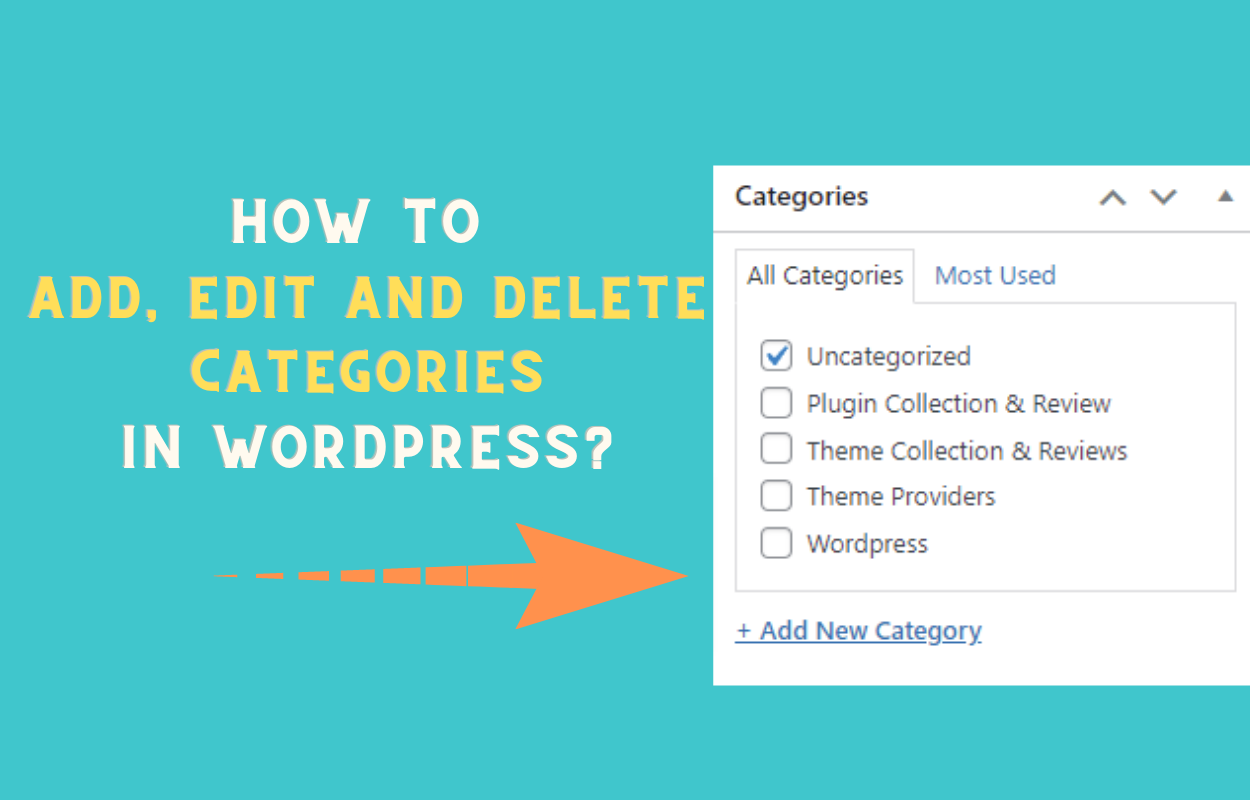
How to add, edit and delete categories in WordPress?
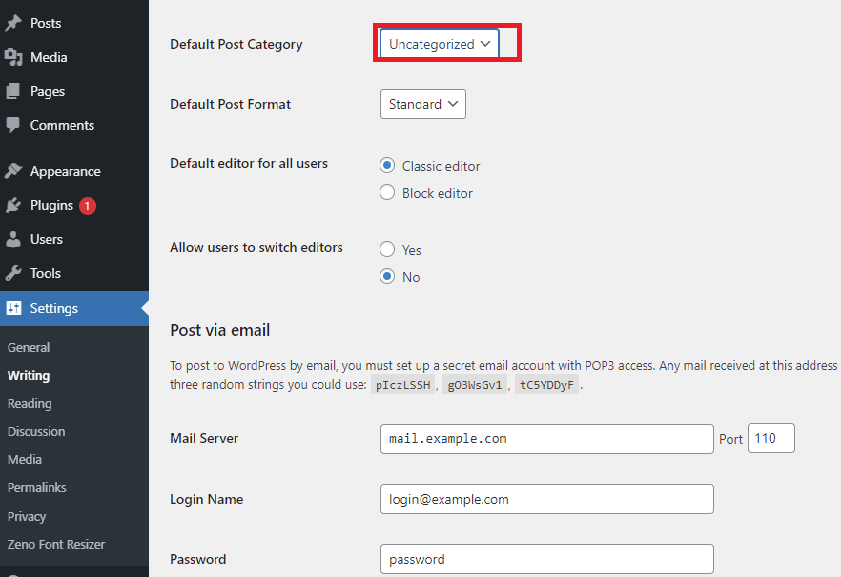
In fact, after creating a new WordPress, just go to Settings > Writing. You can view that WordPress has Uncategorized as a default post category. It means that whether you don’t choose a category for a post, and then your post will be automatically set as the default category. Therefore, you need to add new categories to group your content neatly.

Overall, one website has a wide range of numbers of categories depending on your purposes. In today’s blog, we are going to show you how to add and delete categories in WordPress with a step-by-step guide. Let’s check the following sections.
Adding a new category
Option 1: adding from posts section of Admin Menu
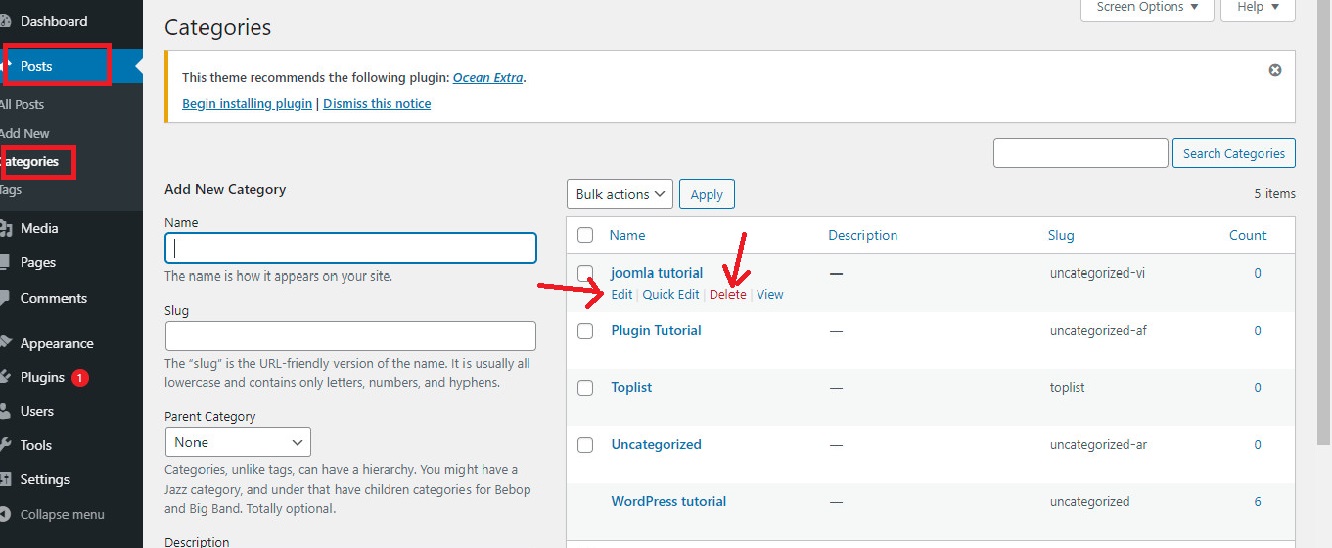
- Just go to Post> Categories on the dashboard. You need to type the name of the category.
- You can optionally customize the slug field. In contrast, if you leave the slug field, the default slug will be set.
- In the Parent category field, you can make this category as a child category. Simply click on Parent category, then a list of drop-down created categories will be displayed. You can select one of them for the parent, otherwise, you can leave it.
- You can add some description of the category or you can also leave it.
- Finally, don’t forget to click on “Add New Category” to finish.

Option 2: Adding Categories when editing the post
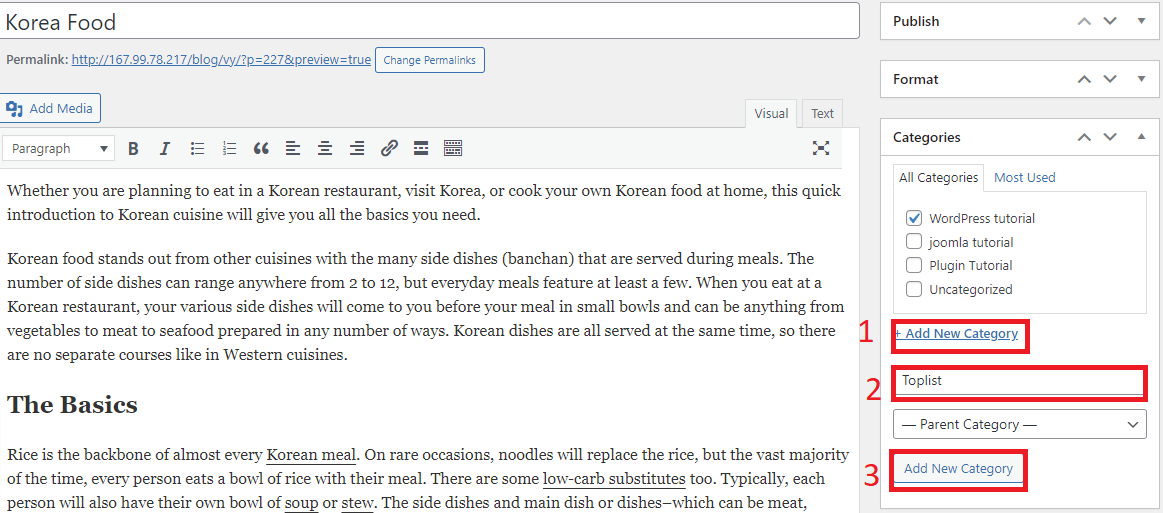
Firstly, go to Posts> Add New on the dashboard to start a new post. Let’s take a look at the right-hand sidebar, you can see a list of sections including the categories. At here, you can choose from available categories, otherwise, add a new category. Now, following the steps below.
- Click on Add New Category, you will get a box to add the name of the category.
- Enter the name of the category
- Now, click on the Add New Category button to add it.

Edit WordPress Category
Just like adding a category, editing an existing category in WordPress is quite simple. You can follow the easy steps below.
- Navigate to Posts> Categories. And hover on the categories which you want to edit
- An edit option will display below the name of this category. Click on it.
- You can edit the name, slug, description, and manage categories easily. And remember to click on the Update button to save the changes.

Delete category in WordPress
For any reason, if you want to delete the category, let’s go to Posts> Categories. Then, hover on the category which you want to delete. You will see a delete option as in the screenshot image above. Click on it to delete the category.
After deleting this category. These posts that were assigned to this category will be reset to the default category.
Summary
We have just shared the easiest steps to add, edit and delete categories in WordPress. We expect that this article will be valuable for your website. In addition, through this article, you can try to add, edit, delete categories by yourself.
If you have any questions or queries, don’t hesitate to mention them in the comment section below. We will give you the support as soon as possible. By the way, our free WordPress Themes has plenty of appealing, high-quality, and responsive themes. If you are going to build a professional website, don’t ignore our website.
